

- What Is the “Ran Out of Memory” Error in Google Chrome for Windows 10?
- How to Fix the Google Chrome “Ran Out of Memory” Aw Snap Error
- Restart your device
- Update Google Chrome
- Clear the browser’s cache
- Disable extensions
- Uninstall unwanted or suspicious Google Chrome apps
- Clear temporary files
- Disable hardware acceleration
- Run Google Chrome’s Cleanup Tool
- Use Chrome’s Task Manager
- Here’s how to open and use the Task Manager:
- Increase the browser’s memory limit
- Increase your paging file
- Perform a clean boot
- Reinstall Google Chrome
- Conclusion
Chrome is an integral part of the Google ecosystem. It explains why it’s difficult to switch to an alternative after experiencing errors that should compel you to walk away. For example, you can tie your passwords, browsing history, and browser extensions to your Google account, and Chrome will integrate everything once you log in with the browser. And we’ve not mentioned shared documents and Google Drive.
Chrome still enjoys the lion’s share of the web browser market, thanks to Google’s practice of making its services smoother with the browser. When users see errors, the automatic response would be fixing them, instead of being fed up. And since other browsers have their own demons, it makes all the more sense to deal with the devil they know.
Being on this webpage (likely on another browser) means you’re looking for how to fix an “aw, snap!” page crash on Google Chrome for Windows. The error in question means you are out of memory.
What Is the “Ran Out of Memory” Error in Google Chrome for Windows 10?
Sometimes, Chrome webpages crash because the browser lacks the required memory to load them. This problem could be the result of insufficient system memory, extension issues, or problematic browser cache. The error could also be showing up because your video RAM is not up to par or Chrome has reached its allowed memory limit.
Can you resolve the problem? Sure. All you have to do is handle the root cause.
How to Fix the Google Chrome “Ran Out of Memory” Aw Snap Error
Knowing the cause of the error would make things easy, but that’s not always possible. The only reasonable way to go about it in most cases is tackling the possible root causes one after the other. It would be best if you started from the most likely causes, just as we’ve laid them out below.
Restart your device
One system reboot can resolve many errors. Multiple background processes and the applications you work with create temporary cache and logs when your system is running. These processes leave footprints behind that can clog the system memory. When your RAM reaches capacity and can’t hold data for the CPU anymore, a memory leak sets in and triggers errors and problems across different applications.
Restarting your system will shut down these applications and clear the RAM. That way, your computer can start with a clean slate. A reboot also clears out other errors, such as app conflicts and hardware malfunctions that result in BSODs.
Note that you have to use the Restart option. Using the Shutdown command won’t do the job, especially if the “Fast startup” option is enabled. So, open Start, click on the Power icon, and then select Restart.

Update Google Chrome
Google releases updates to patch bugs and vulnerabilities and improve Chrome’s performance. Outdated applications tend to spit errors once in a while. If you haven’t updated the program for a long time, you should do that immediately. That could be the fix you’ve been looking for.
To update Chrome, do the following:
- Go to the top-right corner of the browser.
![]()
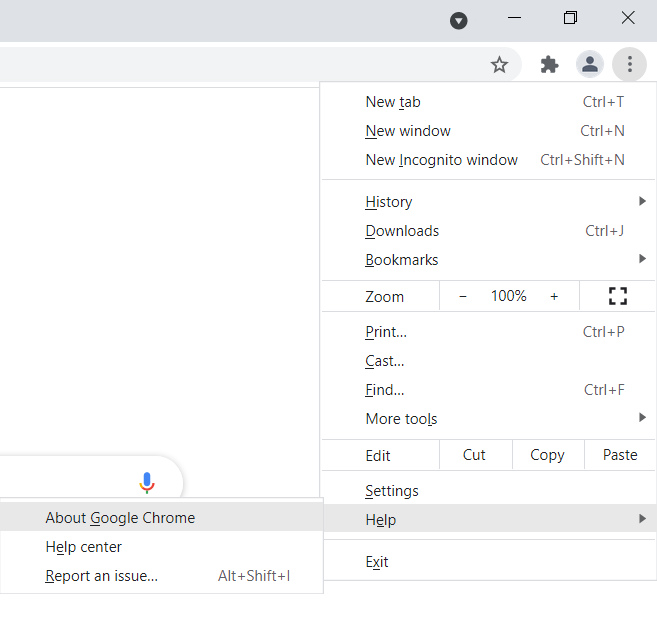
- Click on the three dots, select Help and click About Google Chrome.
![]()
- Select Update Google Chrome and wait until the latest Chrome version is installed.
![Google Chrome will check for updates.]()

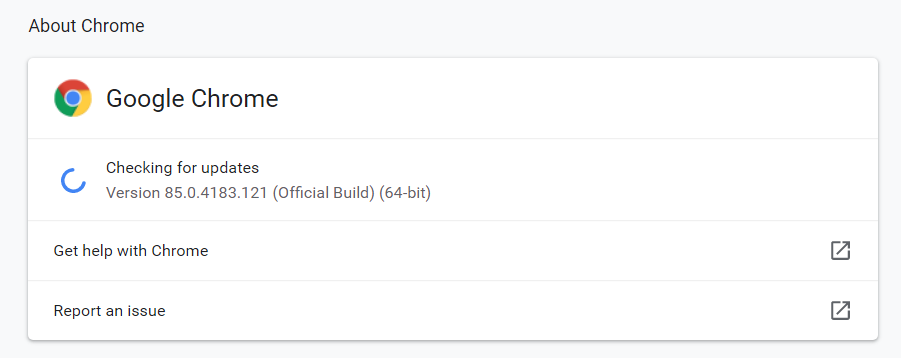
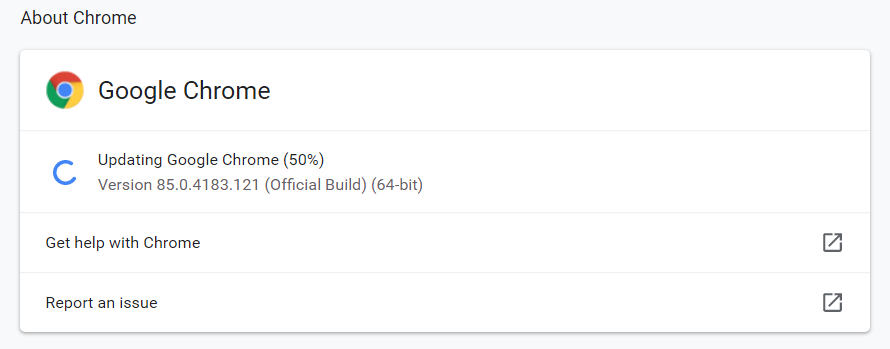
If the button isn’t available, you’re on the browser’s latest version.
Clear the browser’s cache
Your browser saves portions of websites (especially images and videos) in what is known as cache files. These files allow the browser to load these web pages faster when you visit them in the future. Cache files can range from hundreds to thousands. Sometimes, they grow so large that your browser can’t process them, causing the memory error to show up.
Clear Chrome’s cache and check for the issue. These steps will show you how to clear the browser’s cache:
- Launch Search, search for Chrome, and then launch the browser.
- Once Chrome opens, go to the top-right corner and click on the three dots.
![Open Chrome and click on the three dots.]()
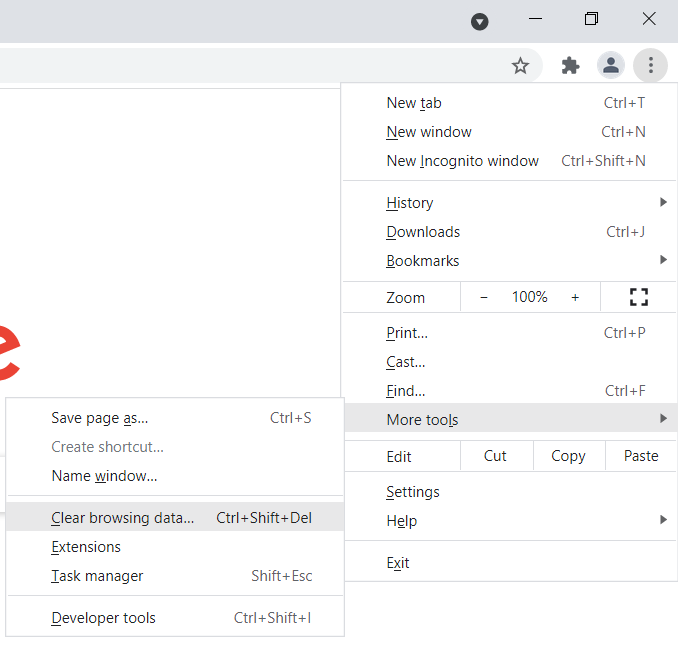
- After the menu opens, select More Tools and click on “Clear Browsing Data” in the menu that slides out.
![Click on "More tools" and select "Clear browsing data".]()
- After the “Clear Browsing Data” dialog opens, stay under the Basic tab, select a time range, and tick the checkbox for “Cached images and files.” You can also click on “Cookies and other site data,” but note that you might lose saved forms and passwords.
- Click on Clear Data.
![]()
- Restart your browser and check for the problem.

Disable extensions
Extensions help you organize things better and allow you to tweak how you interact with the browser. As good as they are, sometimes, they can constitute a nightmare for users, and that’s without adding the security and privacy concerns surrounding them.
You should turn off your extensions or completely uninstall them. To confirm that an extension is the cause of the problem, try opening Chrome in incognito mode. If the error doesn’t show up, then you should definitely get rid of your extensions.
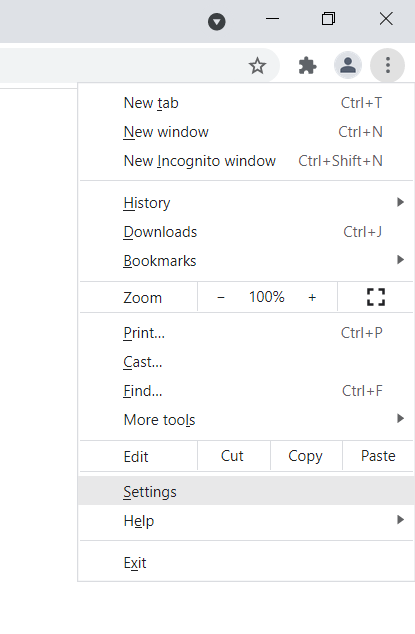
To open a new incognito window, go to the top-right corner of the browser and click on the three dots, then select New Incognito Window.
If you don’t know how to disable extensions in Chrome, here’s what you have to do:
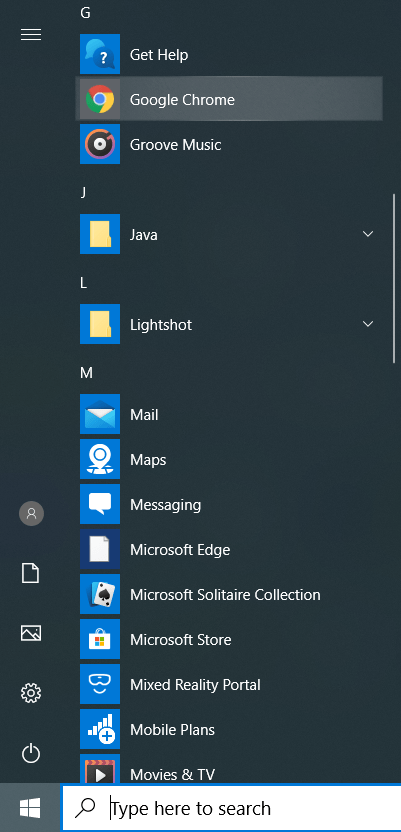
- Launch the Start menu, search for Chrome, and then launch the browser.
![Search for Chrome in the Start menu and click the Chrome icon.]()
- Once Chrome opens, go to the top-right corner and click on the three dots.
![Click on the three dots in the top right corner of the Google Chrome window.]()
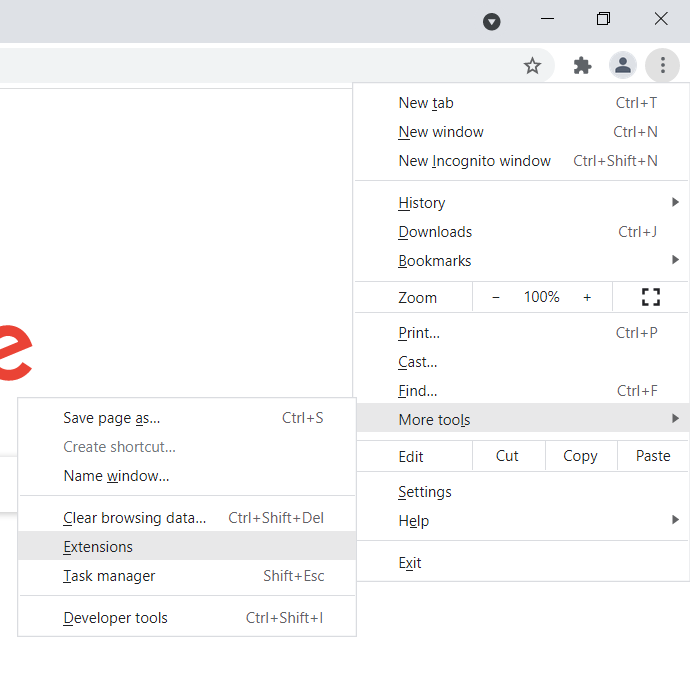
- After the menu opens, select More Tools and click on Extensions.
![Click "More tools" and select Extensions.]()
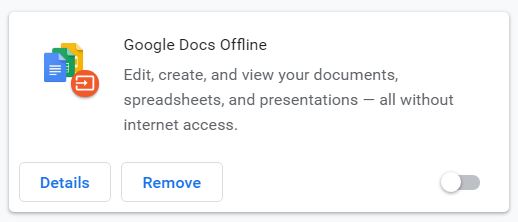
- Once the Extensions page opens, turn off the switch for each extension to disable them.
![Locate the Google Docs Offline extension.]()
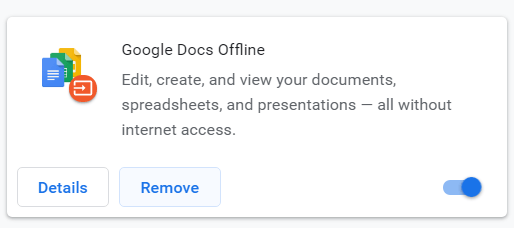
![Disable the Google Docs Offline extension.]()
- After that, restart Chrome and check if the problem has been resolved.
- If the problem goes away, return to the Extensions page and uninstall your installed extensions. To do that, click on the Remove button and select Remove in the confirmation dialog.
![Click on Remove to uninstall the Google Docs Offline extension.]()


Uninstall unwanted or suspicious Google Chrome apps
A web app you downloaded from the Chrome Web Store or installed via your browser might be the cause of the error. Remove the app and check if the problem persists. You can get rid of all your web apps to troubleshoot the problem.
Follow these steps:
- Launch Chrome, go to a new tab, paste “chrome://apps” into the address bar and press Enter.
![Enter "chrome://apps" into the address bar.]()
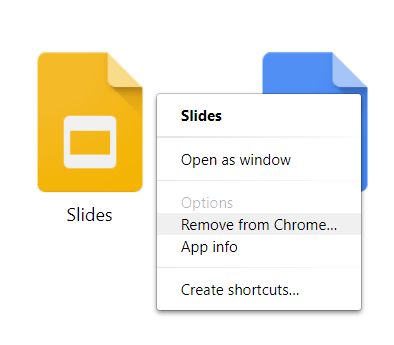
- Once your apps appear, right-click on the app you want to uninstall and click on “Remove from Chrome” in the context menu.
![Select "Remove from Chrome" from the menu.]()
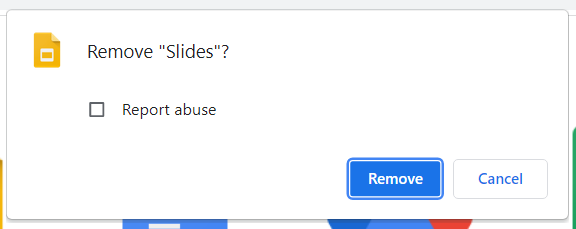
- Select Remove in the confirmation dialog box.
![Click Remove to confirm your choice.]()

Clear temporary files
Your browser and other applications create temporary files they don’t use after a while. Over time, these files grow large and begin to cause problems, from storage shortage to system memory leaks. They could be the reason you’re seeing the “out of memory” error in Google Chrome.
Getting rid of temporary files can help you fix the problem. There are two different ways to do that: using the Disk Cleanup tool and going through the Settings app.
We’ll walk you through both methods.
Using the Disk Cleanup tool:
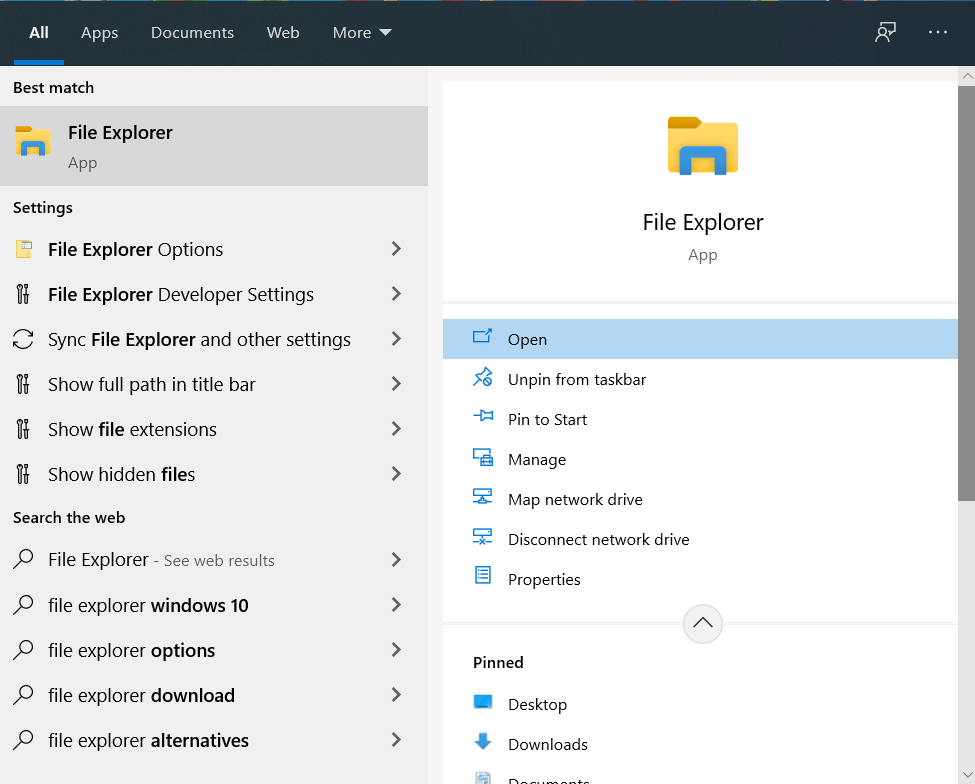
- Open Search, type File Explorer and click Open.
![Open the File Explorer app via Search.]()
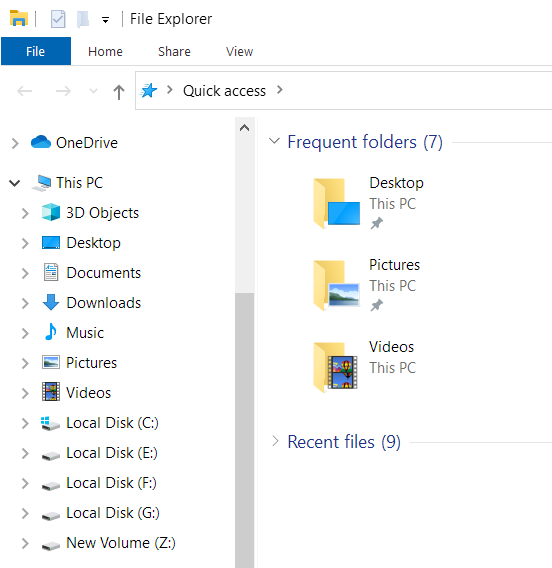
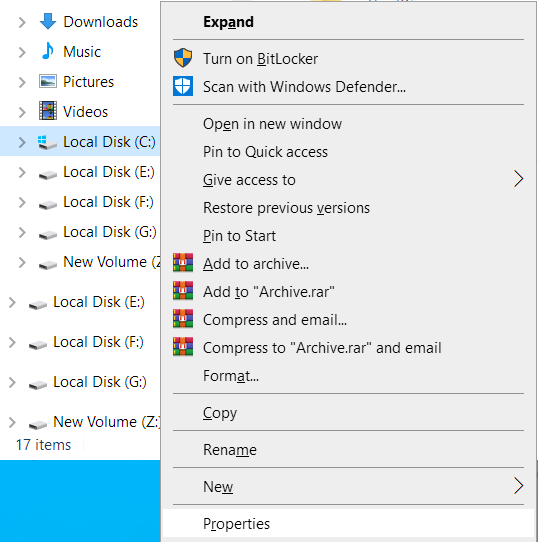
- After the File Explorer window opens, go to the left pane and right-click on your hard drive under This PC.
![Locate your hard drive on the left pane and right-click it.]()
- In the context menu, select Properties.
![Select Properties from the context menu.]()
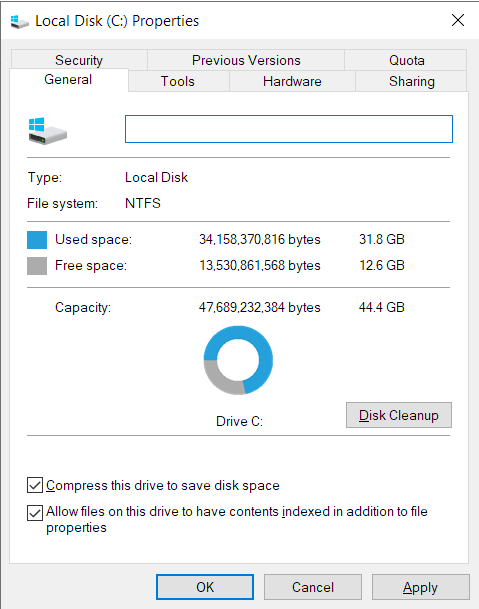
- Once the drive’s Properties dialog box pops up, click on Disk Cleanup in the Capacity section of the General tab.
![Navigate to the General tab and click Disk Cleanup.]()
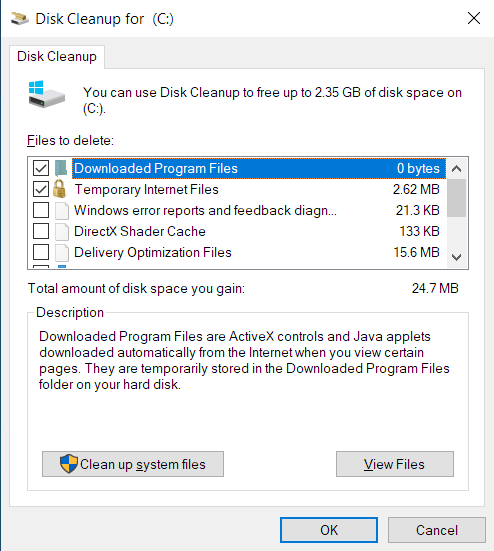
- The tool will locate temporary files on the hard drive and list them.
- After you see the list of temporary files in the Disk Cleanup dialog window, select the categories you want to delete and click on OK.
- Click on “Clean up system files” if you want to remove temporary files created during system app and update installations.
![Click on "Clean up system files" in the Disk Cleanup tab.]()
- After the tool clears the files, restart your system and open Chrome to check for the error.
Going through Settings:
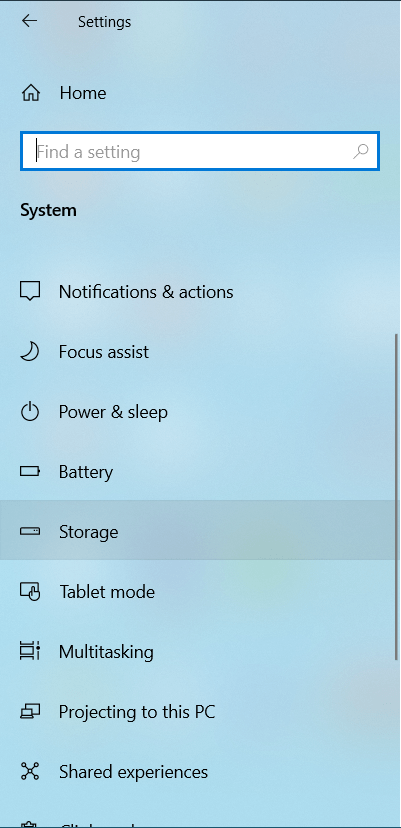
- Tap the Windows logo and I keyboard keys to open the Settings app and click on System.
![Open the Settings app using the Win + I shortcut.]()
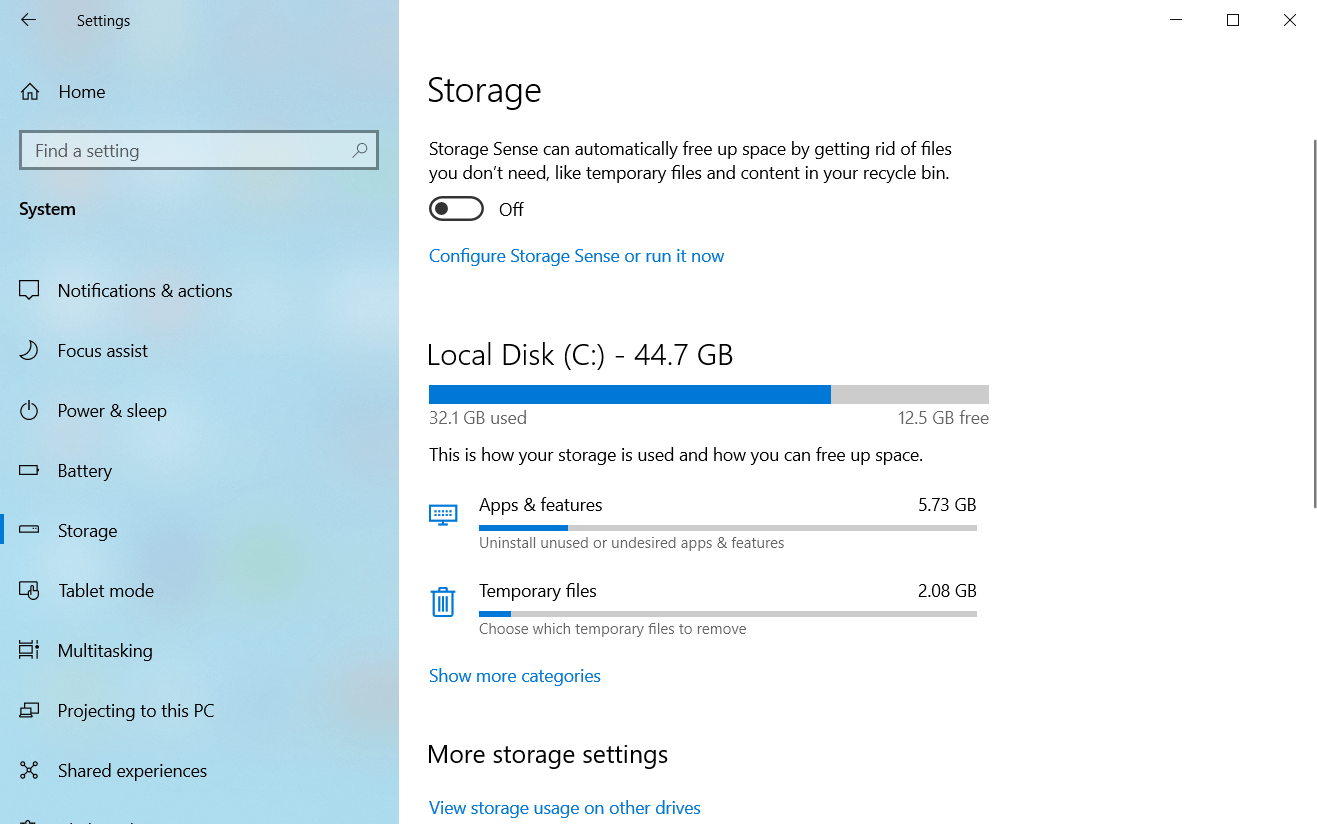
- Once you get to the System page, switch to the left pane and click on Storage.
![Click on Storage from the System menu.]()
- Under Storage, click on Temporary Files.
![Click on "Temporary files" under Storage.]()

Note: The immediate file categories that you’ll see on the Storage page are those for the drive or partition where Windows is installed. If you want to delete temporary files on another drive or partition, go to the “More storage settings” section and click on “View storage usage on other drives.” After that, select a drive on the next page, then click on Temporary Files.
4. Once the Temporary Files interface appears, Windows will scan your temporary files and list the categories of temporary files on your system. The size of each category will also be displayed.
5. Use the checkboxes to choose the categories you want to clean up and click on “Remove files.”
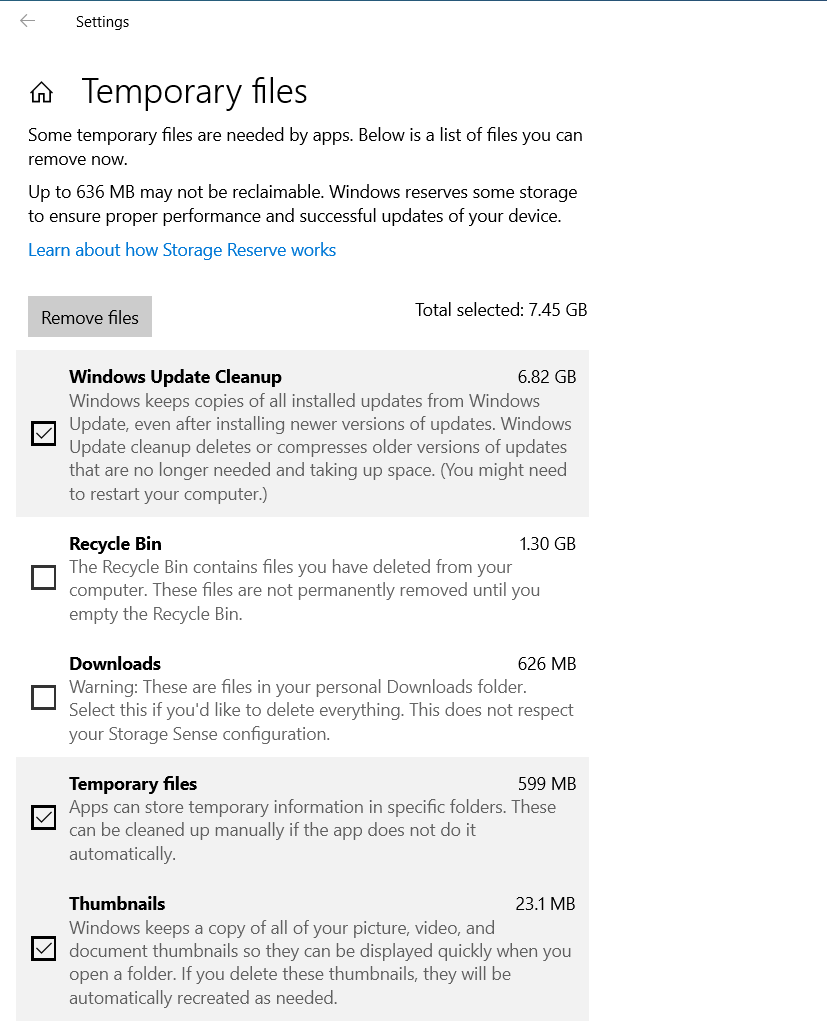
6. Once the files are deleted, restart your system and open Chrome to check for the “out of memory” error.
You can also use a program designed to detect junk files and remove them. Auslogics BoostSpeed does a good job of keeping the system memory free of entities that can easily cause leaks.
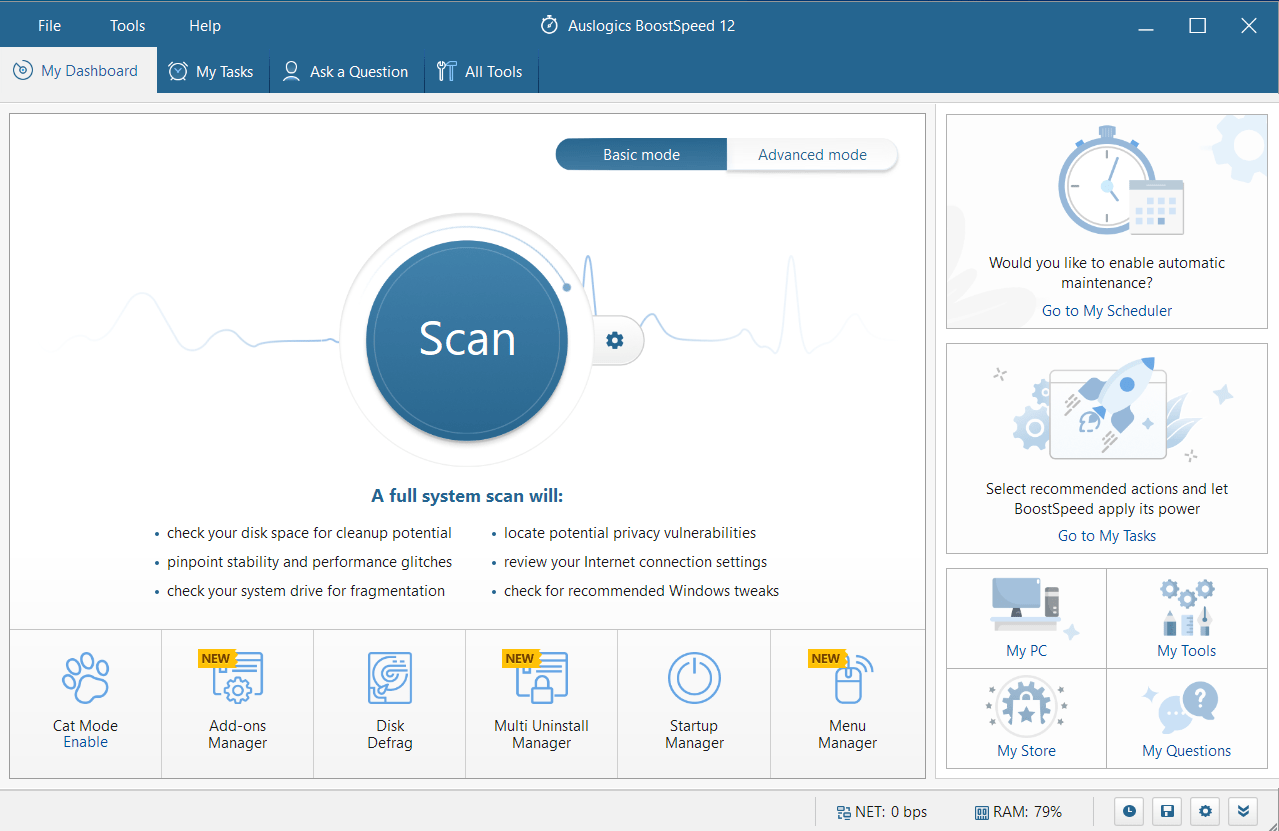
It also scans the system registry for leftover keys that can be harmful to the system in the future and removes them.
Disable hardware acceleration
Google Chrome’s hardware acceleration feature allows it to offload tasks from the CPU to other hardware devices. For example, it can assign video processing tasks to the GPU, even though the CPU can handle them, the reason being that offloading the tasks to hardware specially designed for performing them will take the burden off the CPU and allow things to run smoothly.
Hardware acceleration is intended to boost performance and foster seamless browsing. However, the feature backfires sometimes. If there is not enough memory on your graphics card, you could easily see the “out of memory” error when Chrome assigns heavy tasks to the GPU. Sometimes, hardware acceleration just flat out fails regardless of your video card’s condition and capacity.
Turn off the feature to check if it’s the cause of the error. The following steps will show you how to do that:
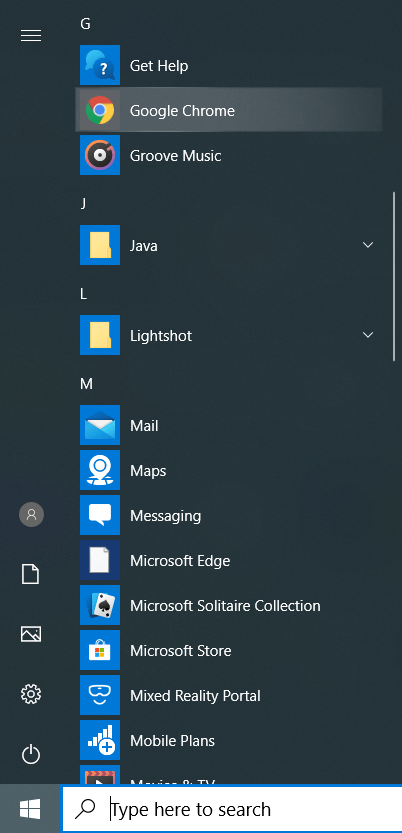
- Click the Start button, search for Chrome, and then launch the browser.
![Locate Google Chrome in the Start menu and click its icon to run the app.]()
- Once Chrome opens, go to the top-right corner and click on the Menu icon (the three dots).
![Click on the three dots in the top right corner to open the Google Chrome menu.]()
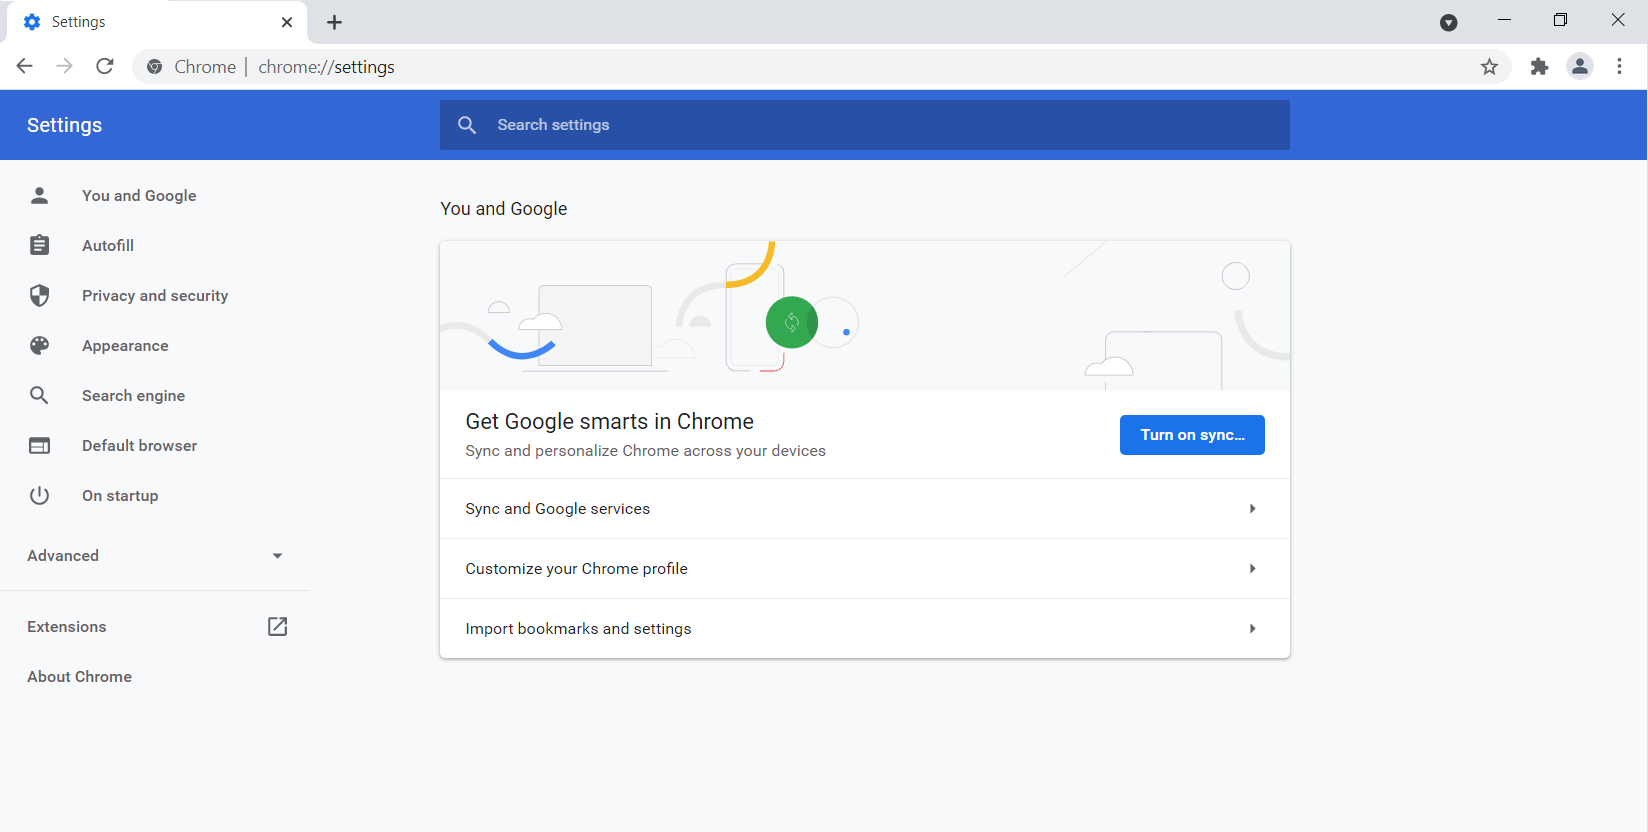
- After the menu opens, select Settings.
![Select Settings from the Google Chrome menu.]()

Note: Another way to open the Settings page in Chrome is by typing “chrome://settings/” into the Omnibox and pressing Enter.
Here is what you should do next:
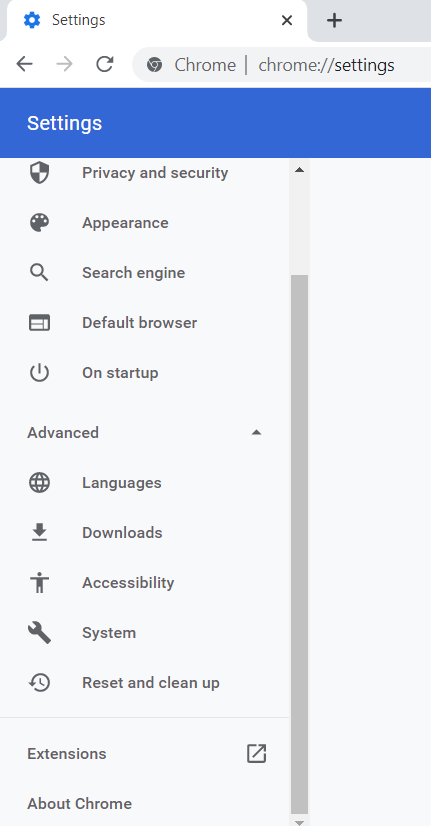
- When you see the Settings page, navigate to the left side of the window and click on the arrow beside Advanced to open the section.
![Click on Advanced from the Settings menu.]()
- Click on System under Advanced.
![Click on System under Advanced.]()
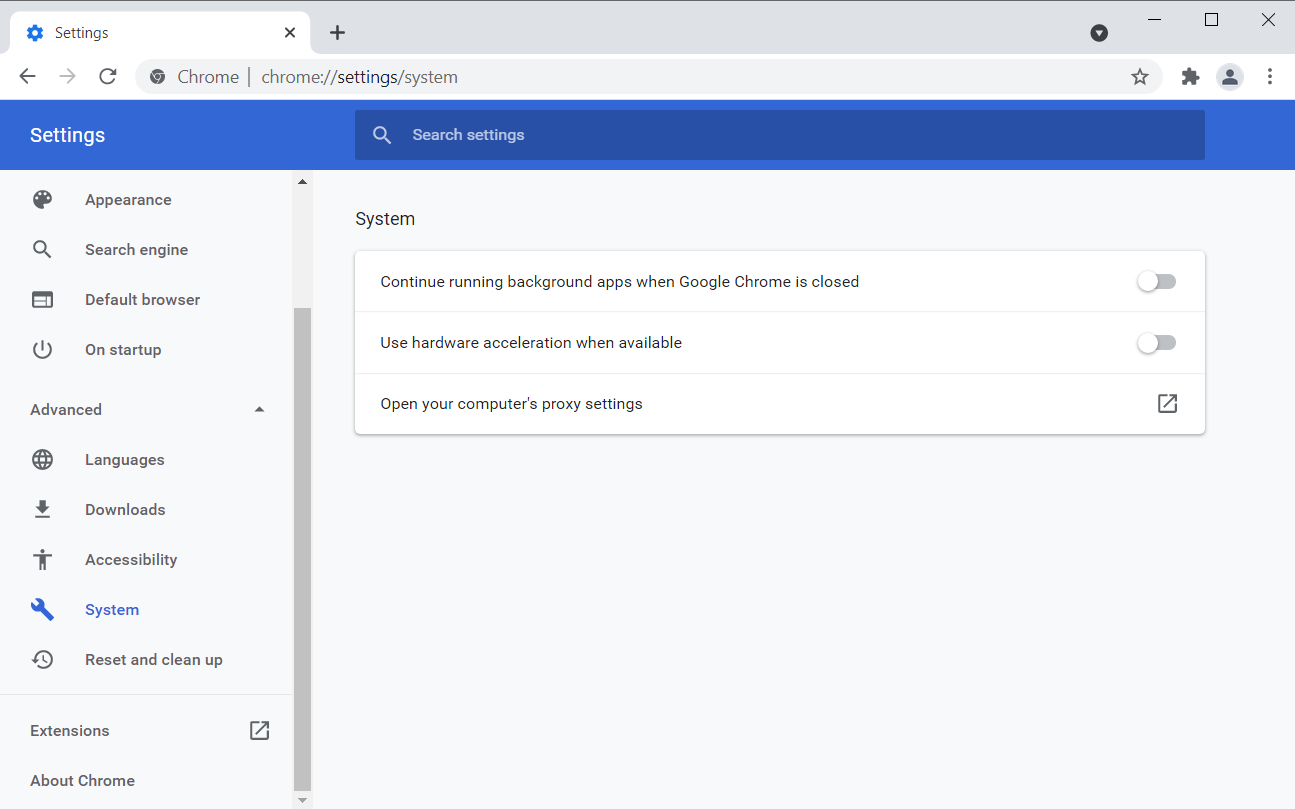
- Go to the right side of the window and toggle off the switch for “Use hardware acceleration when available.”
![Disable the "Use hardware acceleration when available" feature.]()
- Restart Chrome and check for the error.

Run Google Chrome’s Cleanup Tool
The Chrome Cleanup Tool is the browser’s antivirus program. It works by scanning your computer for malicious programs that can harm Chrome. The main concern about the Cleanup Tool for many is privacy. True, the program scans every file on your hard drive, but Google claims it doesn’t have access to them. It only detects malicious files that might be connected to Google Chrome.
Once it finds a program that poses a threat to the browser, it alerts you and deletes the malicious entity after you grant it permission. Normally, the tool sends the metadata of the file and some system information to Google before a pop-up shows up. You can uncheck the “Report details to Google” checkbox to prevent it from sending the details of the malware file to Google.
We recommend that you run the Cleanup Tool. Follow these steps:
- Launch the Start menu, search for Chrome, and then launch the browser.
![Navigate the Start menu to locate Chrome and launch it.]()
- Once Chrome opens, go to the top-right corner and click on the three dots.
![Click on the three dots in the top right corner to open the Chrome Settings menu.]()
- After the menu opens, select Settings.
![Select Settings from the Google Chrome browser menu.]()


Note: Another way to open the Settings page in Chrome is by typing “chrome://settings/” into the Omnibox and pressing Enter.
Now follow the instructions below:
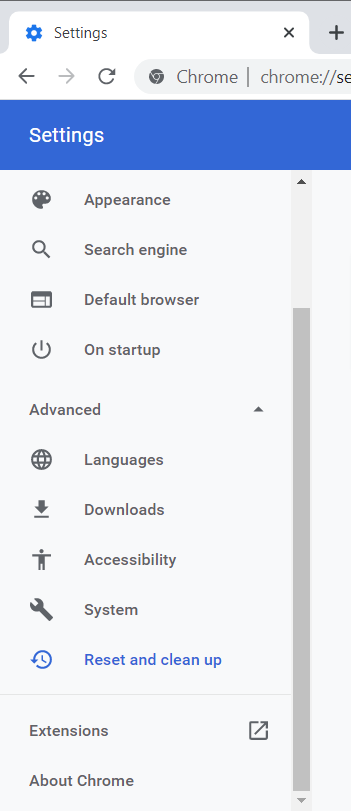
- When you see the Settings page, navigate to the left side of the window and click on the arrow beside Advanced to open the section.
![Expand the Advanced section.]()
- Click on “Reset and clean up” under Advanced.
![Select "Reset and clean up" under Advanced.]()
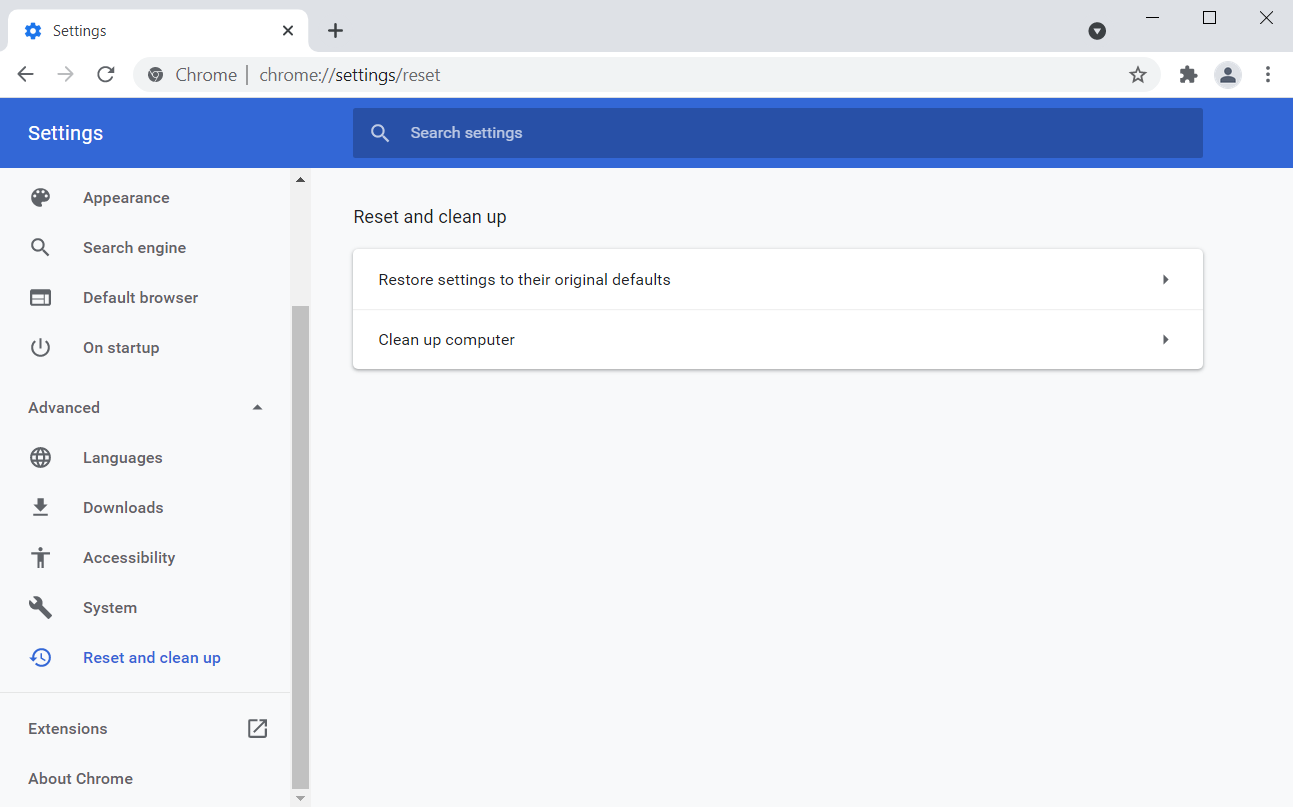
- Go to the right pane and click on “Clean up computer.”
![Select "Clean up computer."]()
- If you don’t want the tool to send details to Google, uncheck the box next to “Report details to Google about harmful software, system settings, and processes that were found on your computer during this cleanup.”
![Uncheck "Report details to Google about harmful software, system settings, and processes that were found on your computer during this cleanup."]()
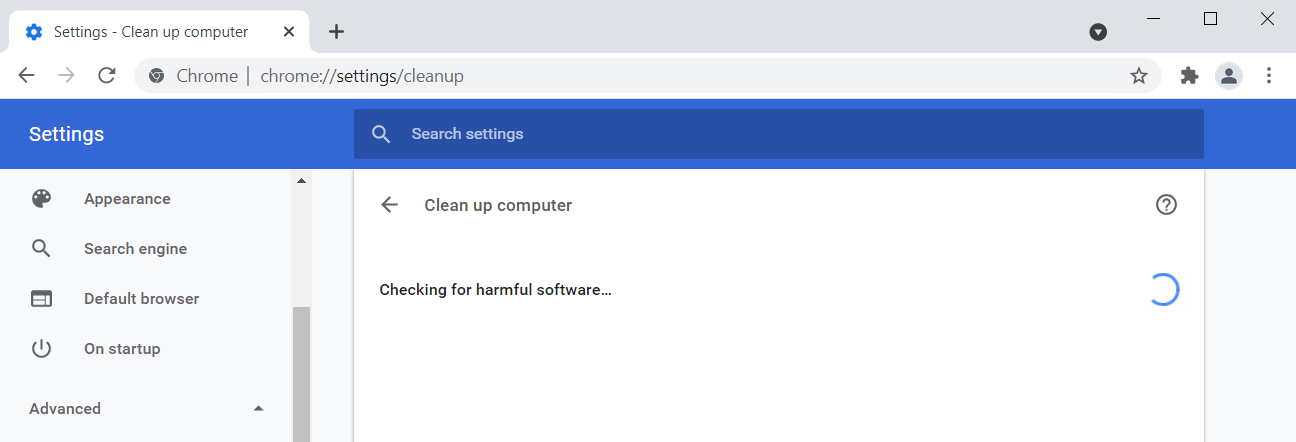
- After that, click on “Find.”
- The tool will begin to search for harmful software and notify you about its findings once the scan is complete.
![Wait while your system is checked for harmful software.]()

Use Chrome’s Task Manager
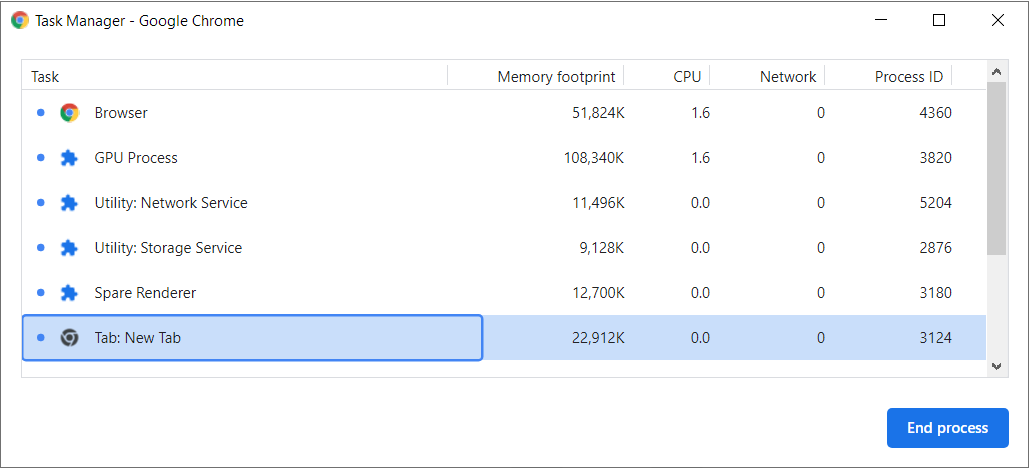
Like Windows, Chrome comes with a built-in task manager that allows you to monitor and manage tabs and extensions. The browser’s Task Manager has a simple and straightforward interface. It shows you the process IDs of subtasks and their individual memory footprints. This way, you’ll get to find out which process is consuming Chrome’s allocated memory and causing the problem.
Here’s how to open and use the Task Manager:
- Launch the Start menu, search for Chrome, and then launch the browser.
![Launch Chrome from the Start menu.]()
- Once Chrome opens, go to the top-right corner and click on the three dots.
![Click on the three dots in the top right corner to access the Google Chrome menu.]()
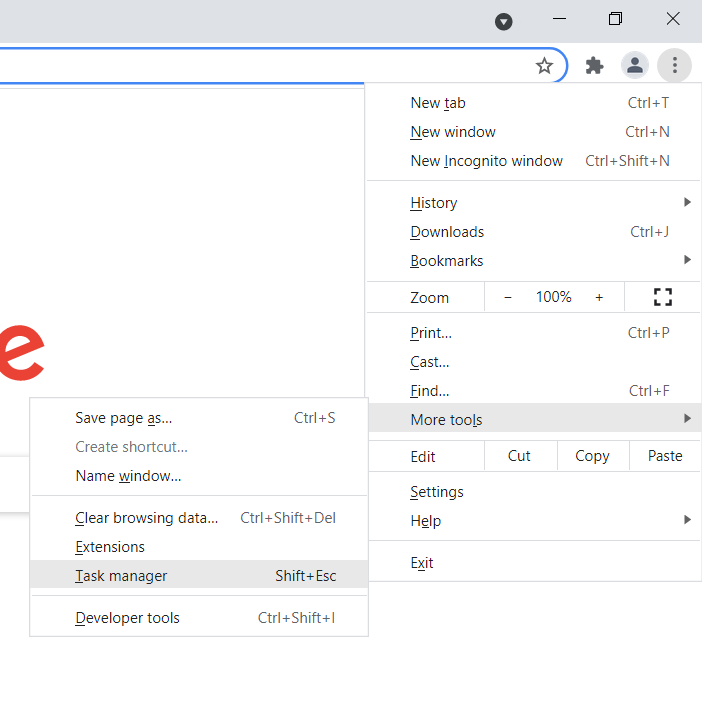
- After the menu shows up, select More Tools and click on Task Manager.
![Click More Tools and select Task Manager.]()
- Once the Task Manager floating window opens, scroll through to find a tab or extension with an unnaturally high memory footprint and end it. To end a process, click on it and select End Process in the bottom-right corner of the window.
![Disable the tab that consumes a lot of resources from the Task Manager.]()


Increase the browser’s memory limit
Chrome comes with a memory cap by default. The caps are different for 32-bit and 64-bit operating systems, and they’re set for each tab in the browser. Google Chrome is configured to save a tab’s operations to the system memory when the user has switched to a different tab. This way, the browser can easily display the tab whenever the user activates it without having to reload the webpage again.
The default memory limit is normally enough for regular browsing. But if you’re working with websites that require huge memory, you can increase Chrome’s memory limit.
The memory limit for 32-bit systems is 512MB, while the limit for 64-bit systems is 1.4GB. To change the limit, you have to modify the target link for Chrome’s Start menu shortcut. Follow these steps:
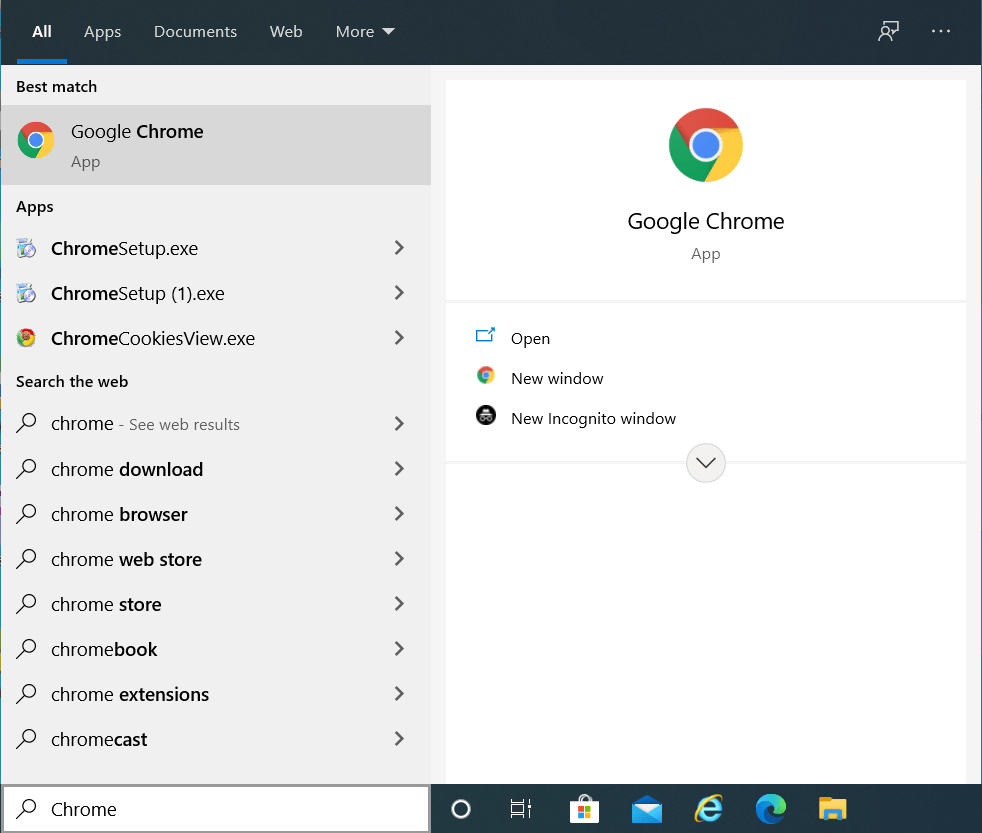
- Press the Windows and S buttons on the keyboard or go to the taskbar and click on the magnifying glass icon.
- Once the search box comes up, type Chrome.
![Type Chrome into Search.]()
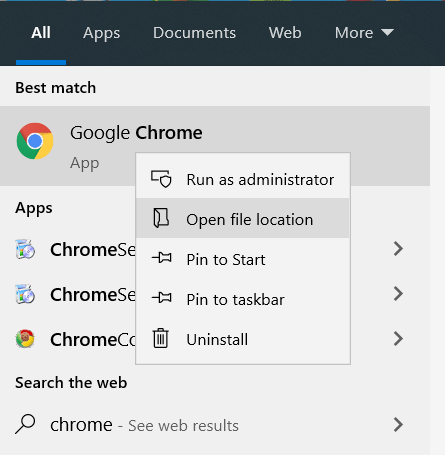
- Right-click on Google Chrome in the search results and select “Open file location” from the context menu.
![Right-click on Google Chrome and click "Open file location".]()
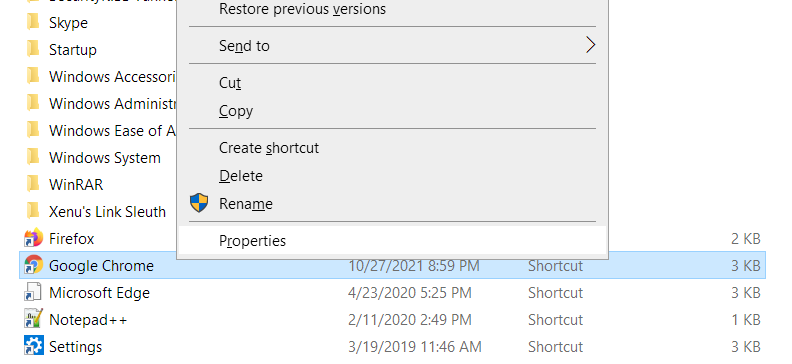
- Right-click on the Google Chrome shortcut and click on Properties in the context menu.
![Right-click Google Chrome and select Properties.]()
- Once you see the Properties dialog window, replace “C:\Program Files (x86)\Google\Chrome\Application\chrome.exe” with “C:\Program Files (x86)\Google\Chrome\Application\chrome.exe” –max_old_space_size=4096″.
Note: All you’re doing is adding –max_old_space_size=4096 to the current target location. Don’t copy and paste the path above if it’s not the same as the target location in the Target box.
- Click on OK and open Chrome to check for the problem.
Increase your paging file
Windows creates a paging file on your hard drive when the main system memory reaches capacity. Also known as a swap file, the virtual memory is intended to supplement the main memory so that you don’t have memory leaks.
The paging file also has its limit. Windows does not increase the file’s size if it’s set to automatically manage the page file. And if the size of the virtual memory isn’t sufficient to extend the RAM, you’ll experience issues.
So, increase the page file and check if it has resolved the “out of memory” problem in Chrome.
These steps will show you what to do:
- Tap the Windows and I keyboard keys to open the Settings app.
![Open the Settings app using the Win + I shortcut.]()
- After Settings shows up, click on System.
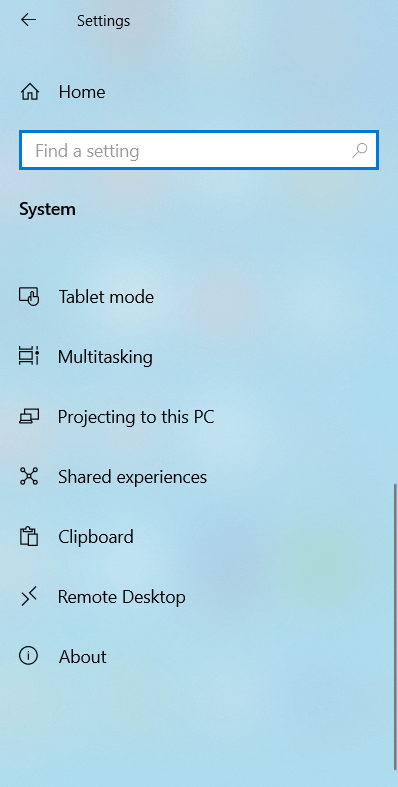
- Once you get to the System page, switch to the left pane, scroll down, and click on About.
![Enter the System menu and click About on the left pane.]()
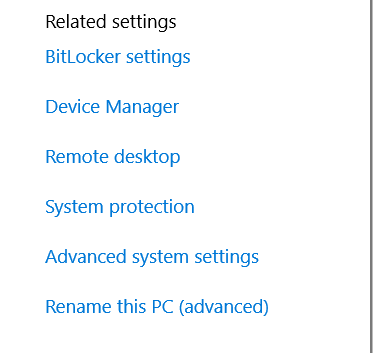
- Head to the right side of the screen and click on “Advanced systems settings” under “Related settings”.
![Select "Advanced systems settings" under "Related settings".]()
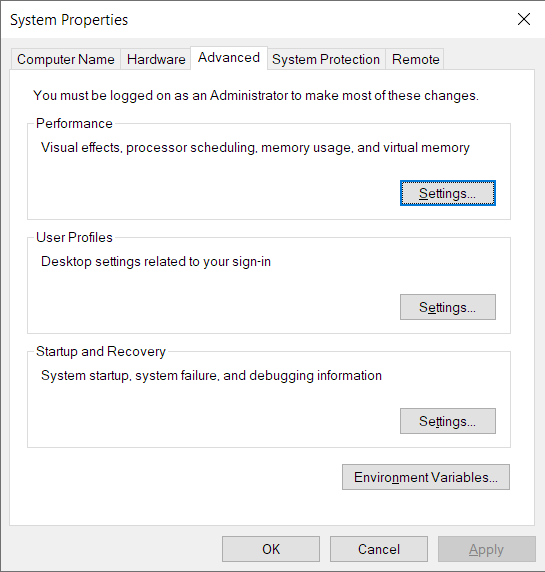
- Once you see the Advanced tab of the System Protection dialog, click on Settings under Performance.
![Click on the Settings app under Performance.]()
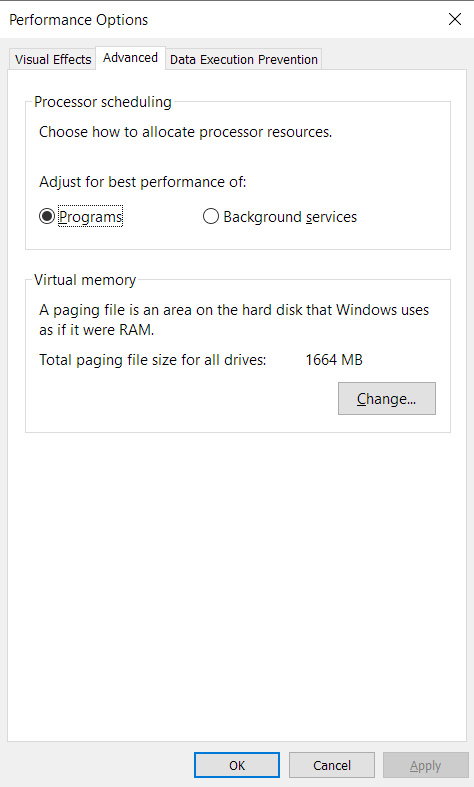
- Go to the Advanced tab of the Performance Options dialog box and click on Change under Virtual Memory.
![Go to the Advanced tab in Performance Options.]()
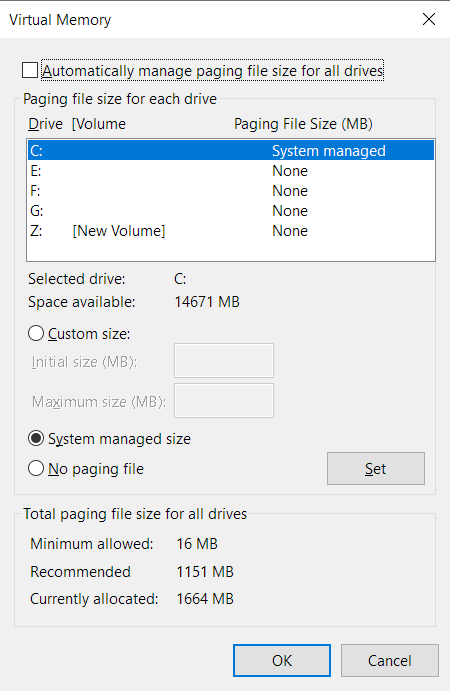
- After the Virtual Memory dialog box opens, uncheck the box next to “Automatically manage paging file size for all drives” and select your main Windows drive.
![Uncheck "Automatically manage paging file size for all drives" and select your main Windows drive.]()
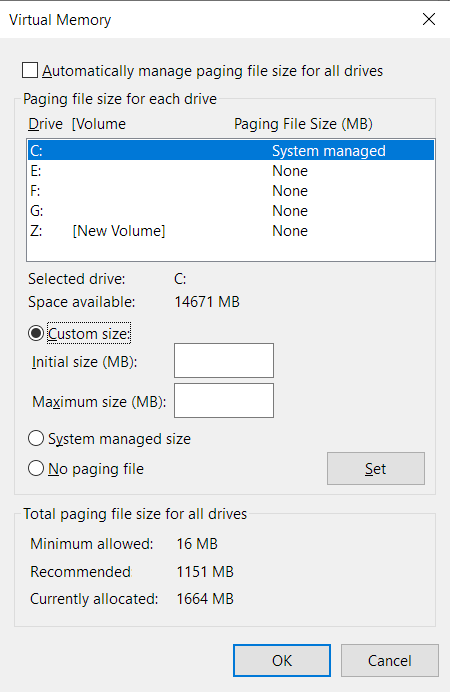
- Click on the Custom Size radio button and increase the Initial Size and Maximum Size of the paging file in megabytes.
![Click on Custom size and set the Initial size and Maximum size.]()
- Click on OK after entering the figures, then open Chrome and check for the error.

Perform a clean boot
Other applications can use up your system memory and cause Google Chrome to spit out the annoying error. Some of these applications are startups. They launch when Windows boots up and continue to run in the background. Running a clean boot will allow you to confirm whether a startup app is the cause of the problem and identify the culprit.
To run your system in a clean boot state, you have to disable every startup program and service, then restart your computer.
Firstly, follow these steps to disable startup programs:
- Tap the Windows and I keyboard buttons at the same time to open the Settings app.
![Tap the Win + I shortcut to run the Settings app.]()
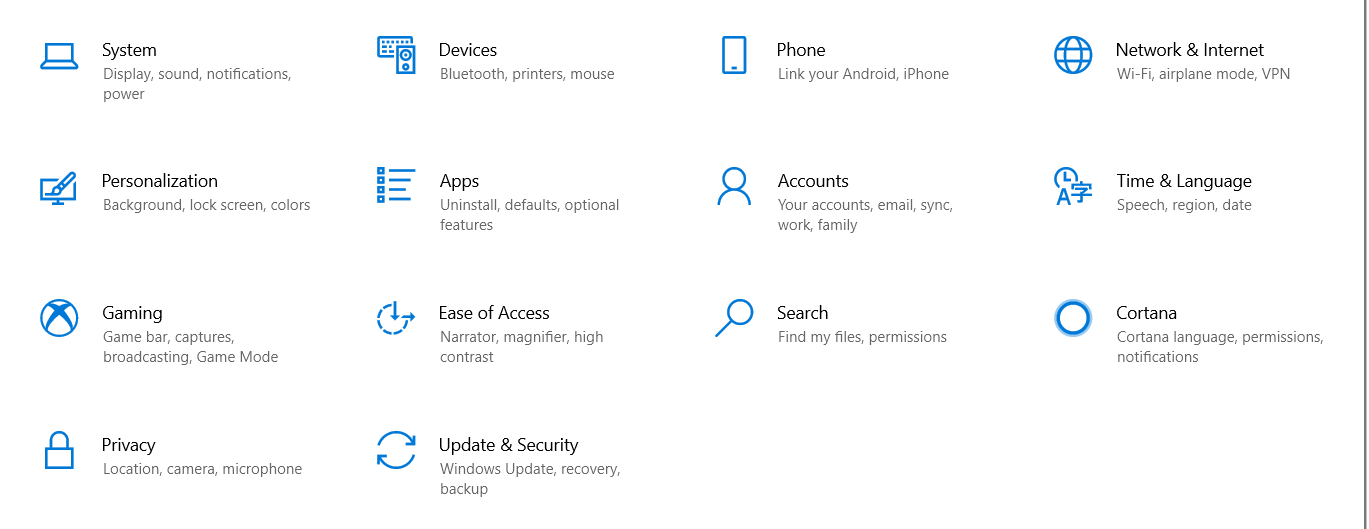
- After Settings shows up, click on the Apps icon.
![Enter the Apps menu.]()
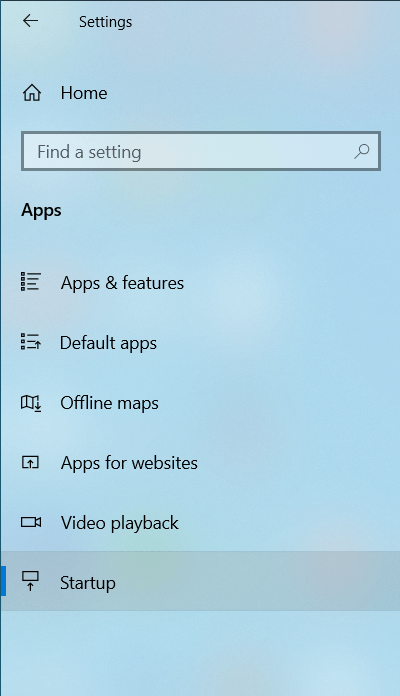
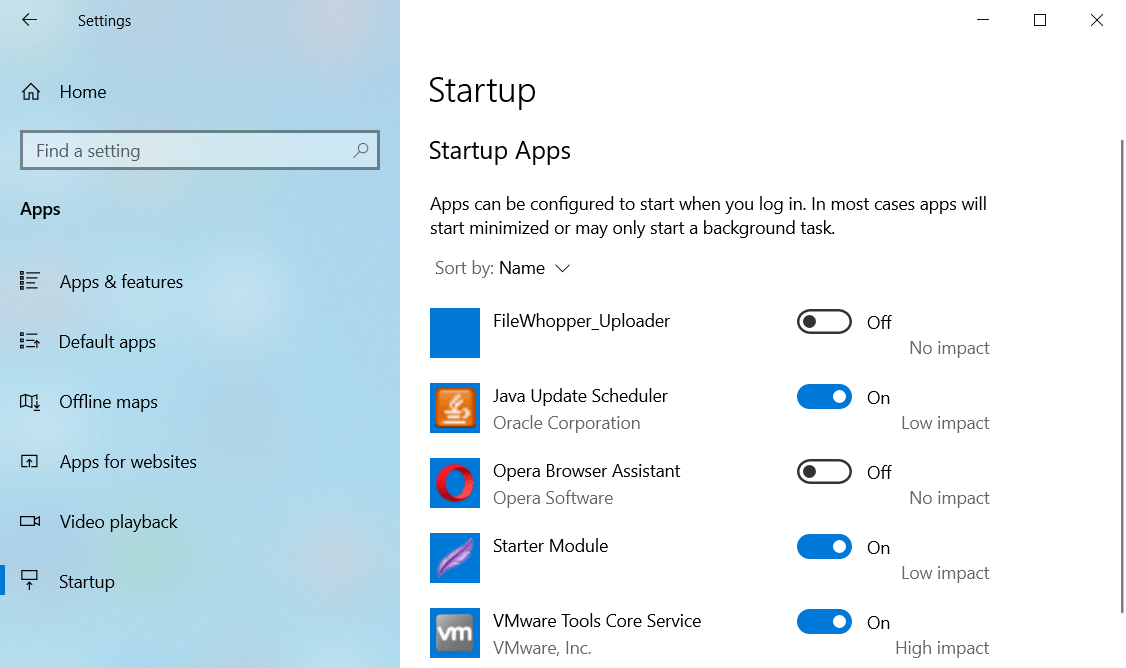
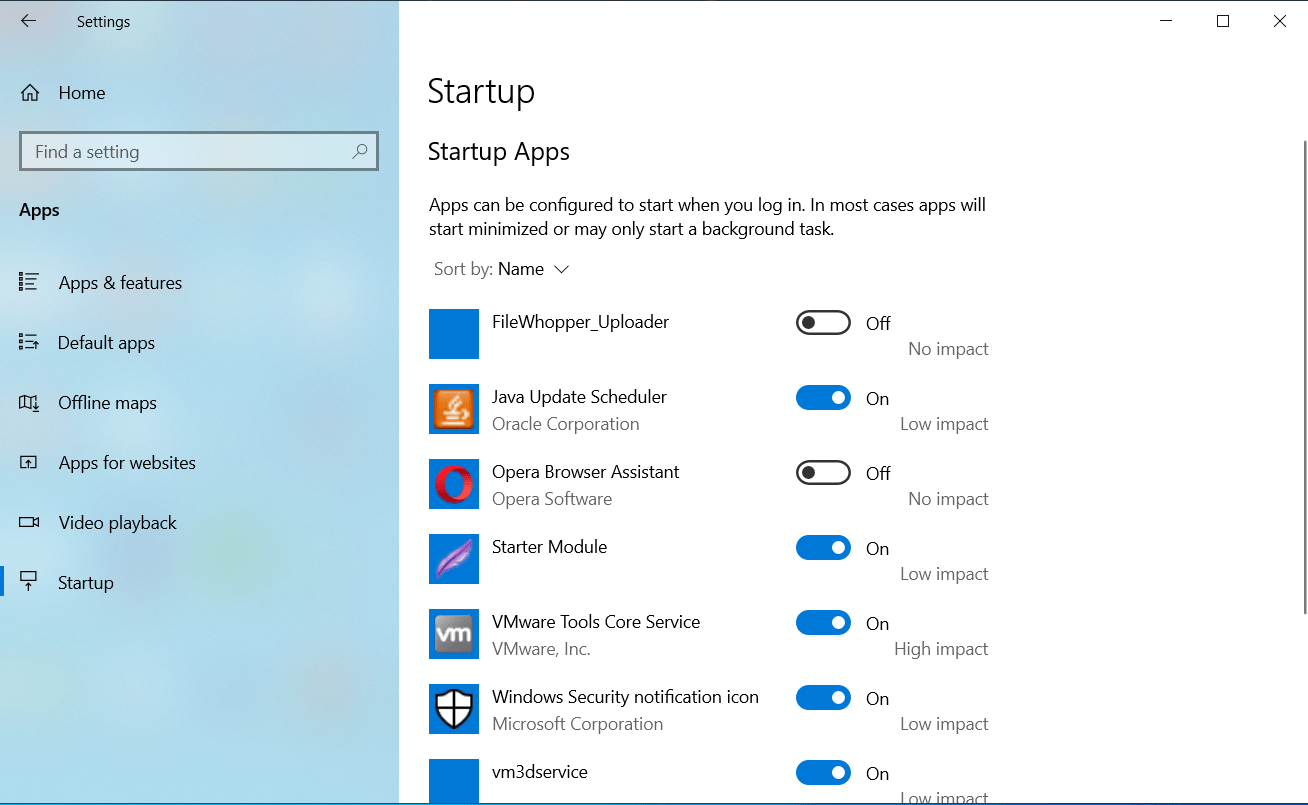
- Once you see the Apps interface, go to the left pane and click on Startup.
![Click on Startup under Apps.]()
- Head to the main page and toggle off the switch for the programs under Startup Apps.
![Disable unnecessary programs under Startup Apps.]()

Follow these steps to disable startup services:
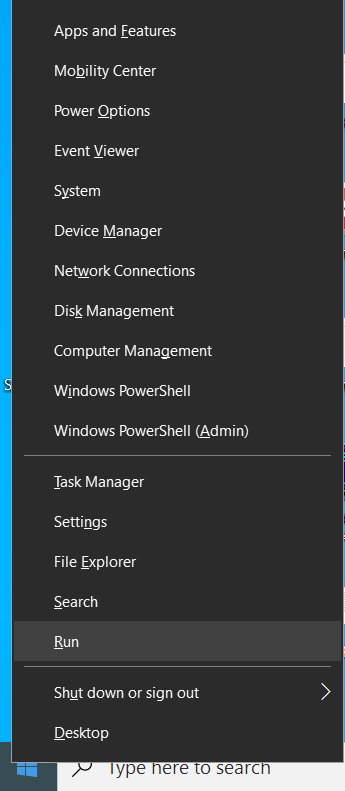
- Right-click the Start button in the taskbar and click on Run in the Power User menu.
![Select Run from the Power User menu.]()
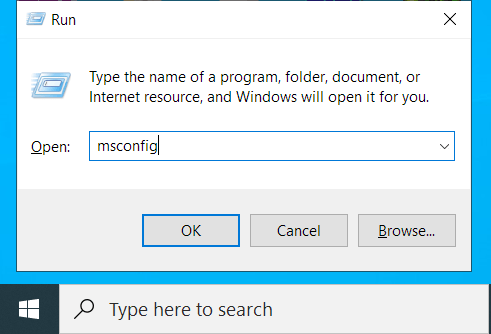
- After the Run dialog window opens, type “msconfig” and punch the Enter key on your keyboard.
![Type msconfig into the Run console.]()
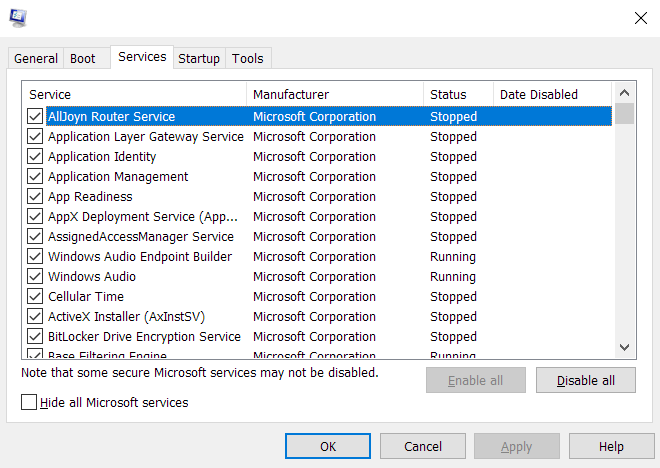
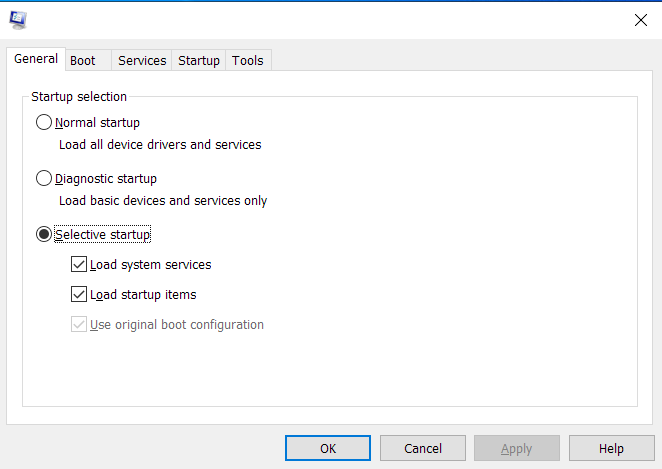
- You’ll now see the System Configuration dialog box. Switch to the Services tab.
![Navigate to the Services tab of the System Configuration]()
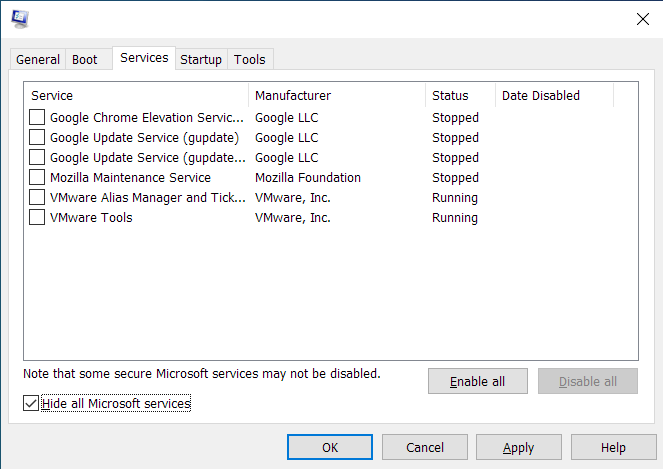
- Once you get to the Services tab, mark the box for “Hide all Microsoft services” to exclude operating system services from the list.
![Open the Services tab and check "Hide all Microsoft services".]()
- Next, click on the Disable All button.
![Click on "Disable all" on the right.]()
- Click on OK, then restart your computer.
![Click on the OK button to save the changes.]()


After your system starts in a clean boot environment, open Google Chrome and load a website. If you don’t see the error message, you just confirmed that a startup program is behind the problem. To find the culprit, you have to enable one of these apps, restart your system, then check for the problem. If the first startup service or program doesn’t trigger the error, move on to the next. Continue until the error appears again, and make sure you take note of the last item you enable.
You can follow these steps if you don’t want to go through the startup items one after the other:
- Launch the System Configuration dialog box.
![Launch the System Configuration dialog box.]()
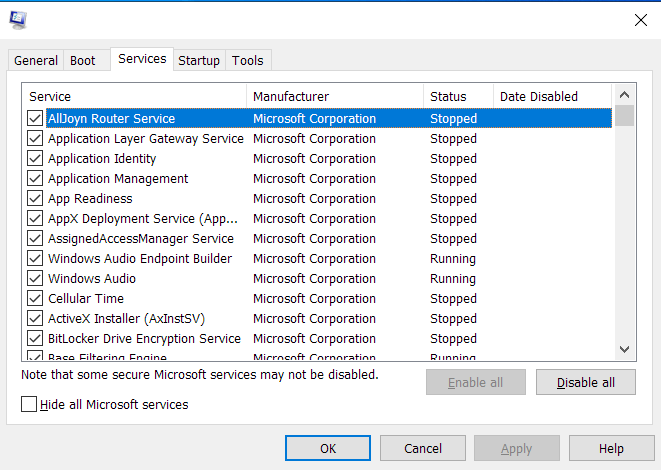
- After the window opens, go to the Services tab.
![Navigate to the Services tab.]()
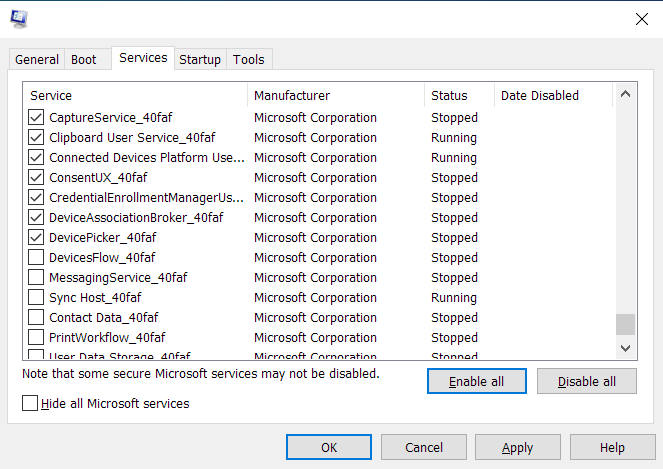
- Select half of the services under the tab (from the top) and click on Enable All. If all the services are checked, uncheck half from the bottom.
![Click on the "Enable all" button.]()
- Click on OK, then restart your computer and open Chrome to check for the error.
- If the error appears, one of the services you enabled is the cause. This means you don’t have to check other services, just the ones you enabled. If the error doesn’t occur, then you can ignore the services you enabled and check the others.
- Use the same technique for the startup programs in the Settings app.
![Launch the Settings app and go to Apps.]()
- Enable half and check if one of the programs in the group is the cause of the problem.
![Disable some startup apps to check for the problem.]()

However, if the error shows up after starting your system in a clean boot state, none of the startup items is the cause of the problem.
Reinstall Google Chrome
If none of the methods above has worked, your next step should be reinstalling Chrome. At this point, it makes sense to suspect that some of the browser’s installation files are corrupt. Installing a fresh copy of Chrome’s updated version should get rid of the problem.
Since your browsing history, extensions, apps, and passwords are attached to your Google account, you should have no problem with reinstalling the browser. The only thing that will happen differently is that the browser will have to load those services again.
Follow these steps to remove Chrome from your system:
- Tap the Windows and I keyboard buttons at the same time to open the Settings app and click on the Apps icon.
![Open the Settings app.]()
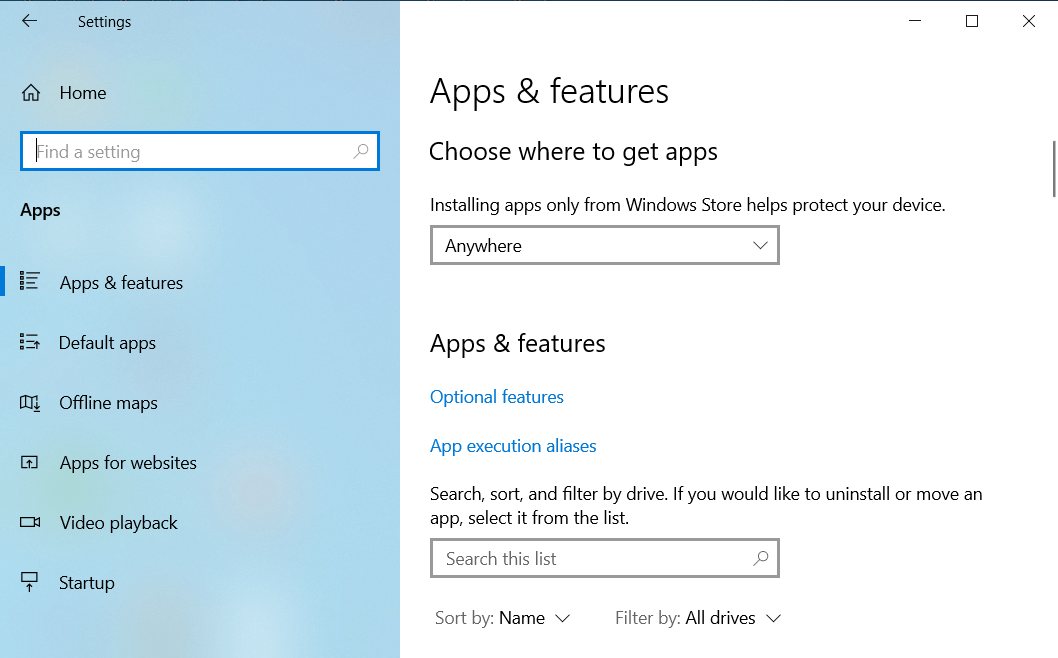
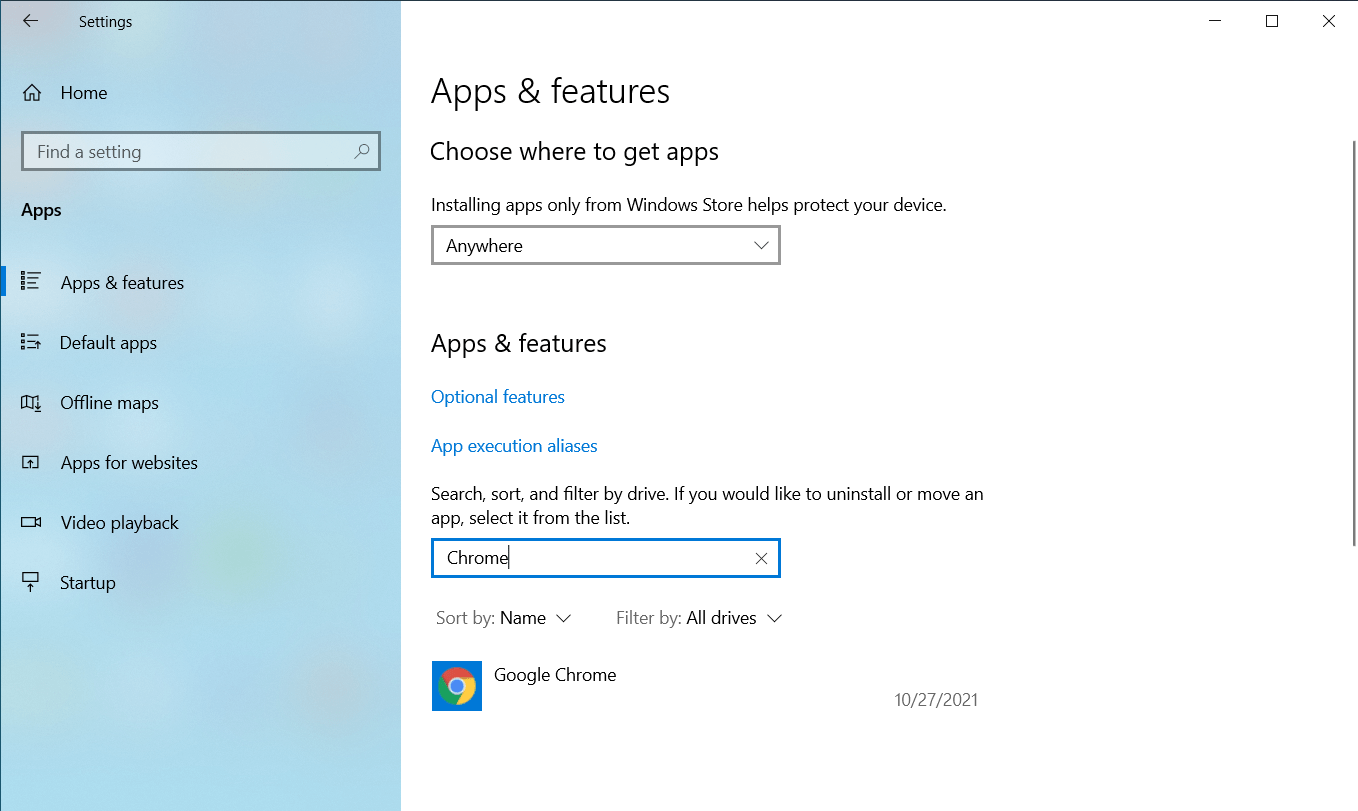
- Once you see the Apps interface, go to the search box under Apps & Features and type “Chrome.”
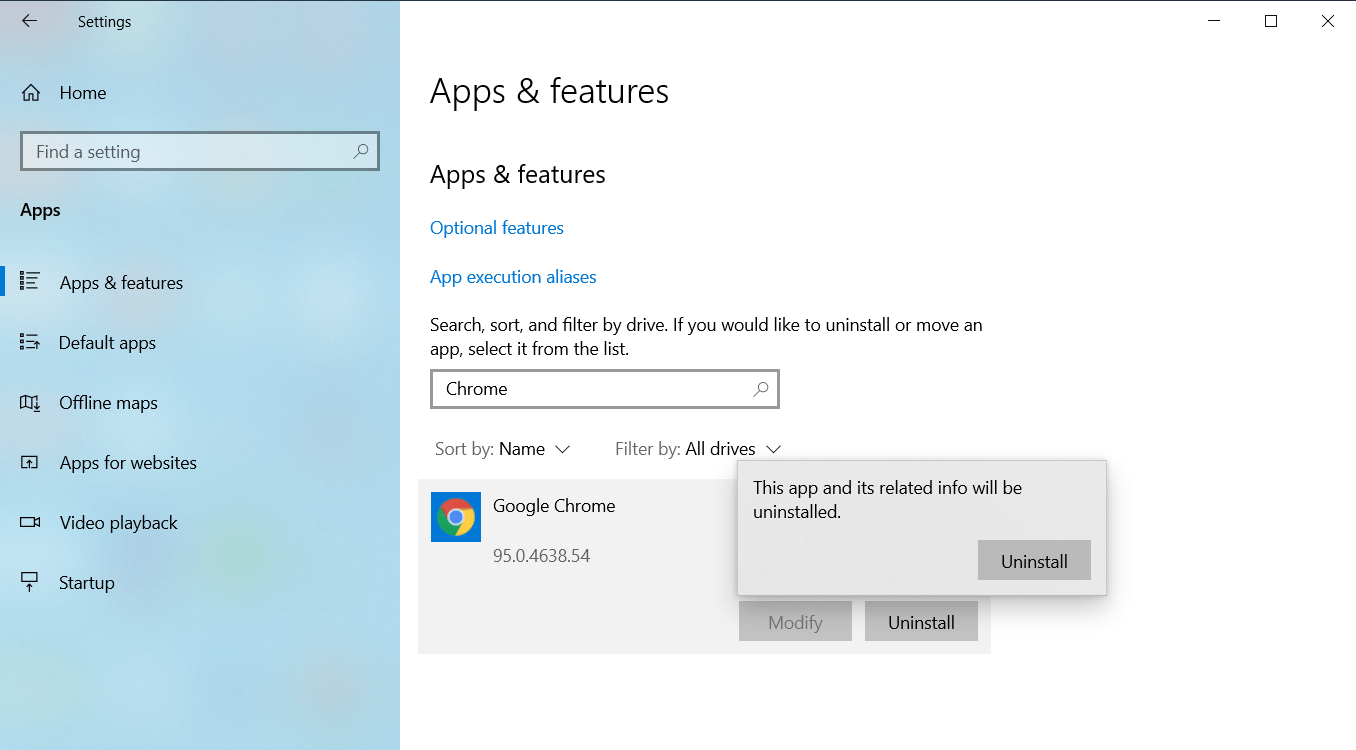
![Type Chrome into the text field under Apps & Features.]()
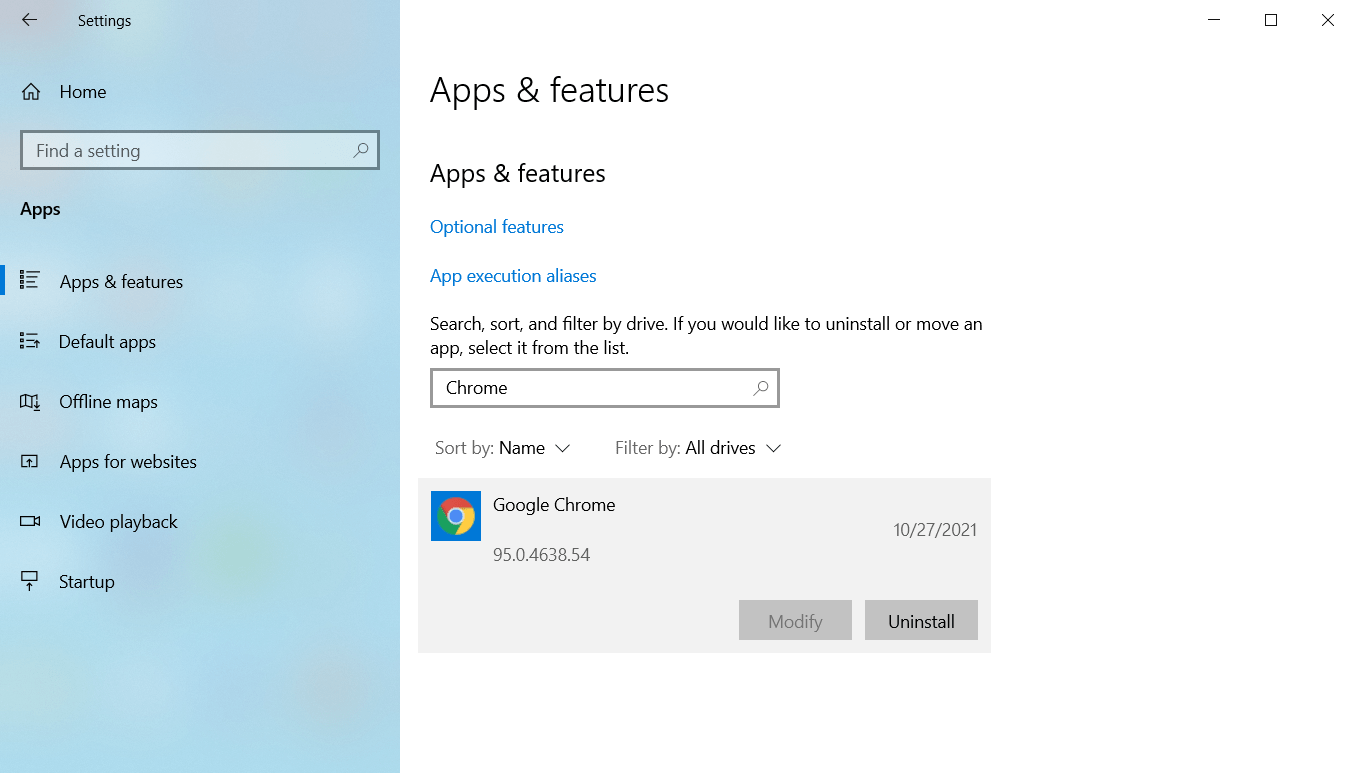
- Click on Google Chrome.
![Click on Google Chrome.]()
- Then click on Uninstall.
![Click on Uninstall.]()
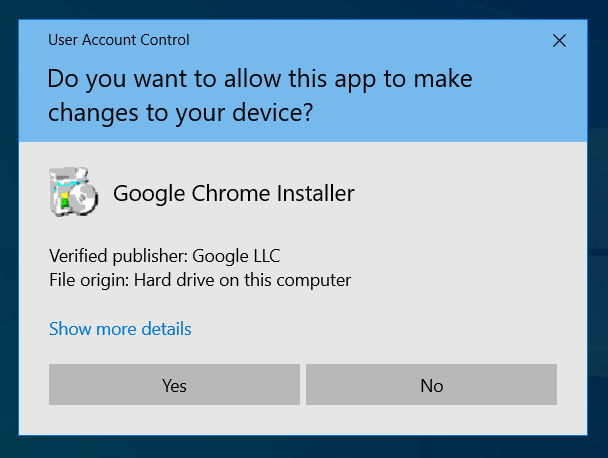
- Click on Yes once the User Account Control pops up and requests permission.
![Click on Yes to grant the necessary permission.]()
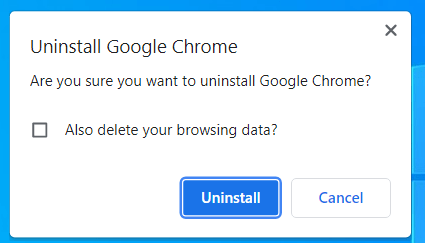
- Follow the subsequent instructions to complete the process.
![Click Uninstall to complete the uninstallation process.]()
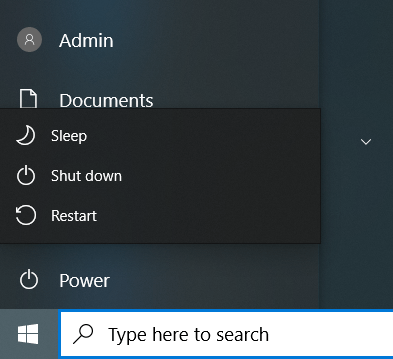
- After Windows removes Chrome, restart your computer.
![Click on Restart from the Power menu.]()
- Next, fire up another web browser, head to Google’s website, and download Chrome.
![Click on Download Chrome.]()
- Install the browser and things should normalize.
Conclusion
That’s how to fix Chrome’s “out of memory” issue. Remember to use specialized software such as Auslogics BoostSpeed to keep your system optimized. The program comes with tools that focus on keeping your system’s performance at the best level.