
The Automatic Repair loop is a common problem that many users run into. The tool is designed to diagnose and resolve issues with the operating system and resolve them.
Unfortunately, sometimes it can have its challenges as well. But don’t worry. There are super easy ways to fix the Windows 10/11 Automatic Repair loop.
Take your time and review the solutions and the screenshots I’ve added to fix the problem.
Let’s get started!
What Is Automatic Repair?
Windows and errors are like peas in a pod. Microsoft knows this, so they have the Automatic Repair tool built into the Windows PC.
Its job is to resolve any software or operating system issues to make sure that your PC is stable.
So, when your computer runs into an error or crashes, Automatic Repair automatically kicks in to fix the problem. You’ll usually see the black or blue screen of death.
Let’s break down how Automatic Repair works. In this context, let’s say Windows detects a startup issue:
- First, Windows will automatically enter the Automatic Repair mode when you turn on your PC.
- Then, it’ll run various diagnostics to find the root cause of the problem.
- Automatic Repair will try to repair the problem based on the diagnosis.
- After attempting repairs, the system will reboot to see if the problem has been resolved. If it has, it’ll restart normally. If the problem is still there, it will try to analyze it further and fix it.
- If Automatic Repair cannot resolve the problem after numerous attempts, it’ll provide alternatives for more advanced troubleshooting.
So it gets stuck in the startup with the screen saying, “Preparing Automatic Repair” or “Diagnosing your PC.”
Windows restarts and repeats itself in an infinite loop when it can’t repair itself. Hence the name “Automatic Repair loop.””
Causes of the Automatic Repair Loop
There are numerous causes for the Windows 10/11 Automatic Repair loop, and they can be challenging to pinpoint. However, the common causes are usually:
- Missing or corrupted system files. This prevents the system from repairing itself because Windows needs these crucial files to run.
- Missing device drivers. Have you recently upgraded your computer? If your drivers are out-of-date, missing, or unsupported, they could cause the Windows Automatic Repair loop.
- Graphic driver issues. When your graphic drivers are faulty or incompatible, the “Preparing Automatic Repair” loop can be triggered.
Other possible causes of the Automatic Repair loop in Windows 11 or 10 include malware infections, broken installation files, faulty components, and corrupted system registries.
But there is no need to worry because the solutions in the following sections will help you resolve the problem.
Related: Help! What to Do If Automatic Repair Couldn’t Repair Your PC
How to Fix the Automatic Repair Loop
Fix 1: Perform a hard reboot
The first thing I’d recommend to fix the Windows 10 Automatic Repair loop is to perform a hard reboot. Just press the power button to do that until your computer shuts down entirely.
After that, remove every peripheral from your PC and wait 60 seconds before restarting the system.
Check to see if the error is displaying. If it is, proceed with the next solution.
Fix 2: Delete or disconnect recently installed apps or connected devices
Another problem that can cause the Automatic Repair loop in Windows 10 or 11 is when you’ve recently installed new apps that are incompatible.
Delete those apps and check if the error is still showing. Furthermore, remove anything you’ve connected recently and see if that solves the problem.
If not, move on to the next fix.
Fix 3: Use System Restore to undo changes
I’ve always encouraged my readers to make backups or create restore points. If you’ve created a restore point, you are in luck! This method may help resolve the problem.
Here’s how to get out of the Automatic Repair loop using the system restore:
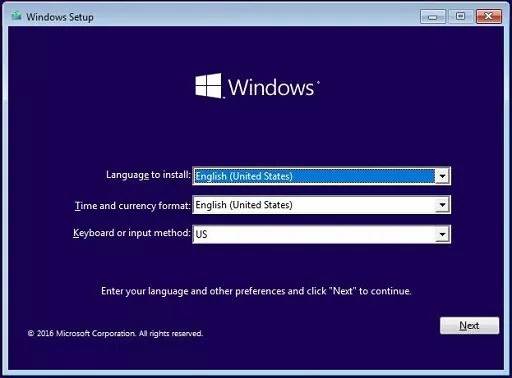
- You’ll need a bootable Windows drive or an installation disc with the Windows operating system installation files. Put it into your computer, restart it, and press F8 or other keys depending on your PC model to boot into Windows Setup.
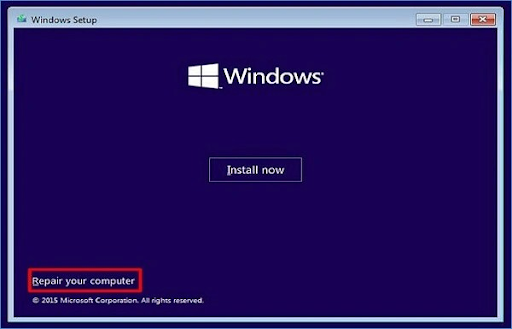
- When the following screen appears, click on Repair your computer.
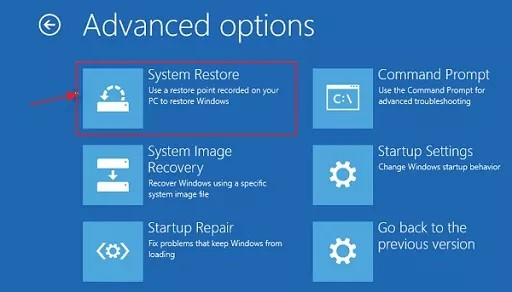
- Then, go to Troubleshoot, select Advanced options, and select System Restore.
- Select a restore point you’ve already created from the list and click Next.
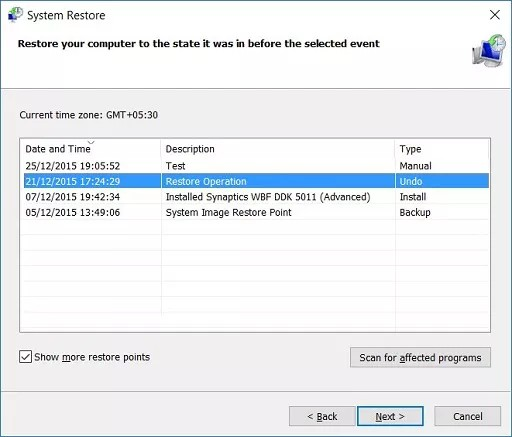
The system restore process will run and restore your computer to its previous state when it had no issues. Hopefully, that should resolve the Windows Automatic Repair loop.
Also read: Help! My Computer Won’t Turn On: Solutions Inside
Fix 4: Run CHKDSK and fixboot commands
Even though I’ve laid out the possible causes of the Windows 10 Automatic Repair loop, you may still not know what exactly caused the error in your case.
If you’re in that situation, you can use the CHKDSK command to check your file system for errors and automatically fix them if it finds any.
Here’s how to do it:
- Restart your PC and press F8 or relevant keys to boot into the troubleshooting menu. Do this before the Windows logo and spinning icon appear.
- Choose to See advanced repair options to begin.
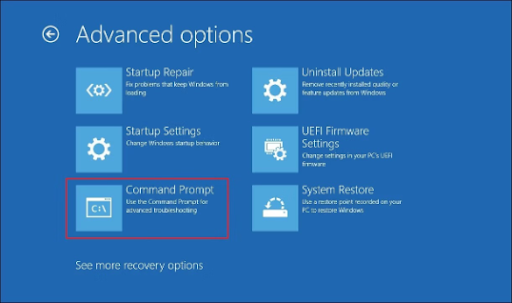
- When the Choose an option window shows up, select Troubleshoot, select Advanced options, and click Command Prompt.
- Type the following command when the command prompt window opens: chkdsk c: /r

If the CHKDSK command fails, try using the fixboot command. Just like the previous command, type fixboot c: and press Enter.

After everything is done, close the CMD window and restart your computer.
So, I suggest backing up your data before proceeding. However, even if you haven’t backed it up, there are still ways to recover your data afterwards.”
Fix 5: Restore the Windows Registry
Sometimes, hard disk issues or malware can corrupt the registry files.
So, you may need to overwrite your Windows Registry entries to get the system working as it should again.
Follow the steps below to resolve the problem:
- Open the Windows boot troubleshooting menu and select See advanced repair options.
- After selecting it, choose Troubleshoot, select Advanced options, and click Command Prompt.
- Type the following and press Enter: C:\Windows\System32\config\regback* C:\Windows\System32\config\
- When you’re asked to overwrite the files, type ALL and press Enter.
Restart your computer and check if you’re still getting the “Preparing Automatic Repair” loop.
Related: How to Back Up and Restore the Windows 10 Registry
Remember that the solutions explained in this article can work on all Windows PCs, including HP and Dell.
If you don’t know much about Auslogics Anti-Malware, this guide may help: Auslogics Anti-Malware: Features and Reviews.
Conclusion
So that is everything you’ll need to know about how to get out of the Automatic Repair loop. I hope these fixes can help you solve the issue quickly.
Also, I strongly suggest keeping your PC in good health to avoid issues like this from happening again. And the best software to handle this dire task is Auslogics BoostSpeed.
It’s got every feature you need to keep your PC performing at its best. Check it out, and don’t thank me. You are welcome!
If you’ve found this article helpful, please share it with your friends, and let us know in the comments below which solution worked for you!
FAQ
When one or more causes occur, your OS automatically enters Automatic Repair to fix itself. However, if it fails to resolve the problem, it gets stuck in the Automatic Repair loop.
However, if the repair process keeps looping for a long time, please contact a professional or the official support channels.
I suggest that you give a call to a professional before attempting any of these options. They can give you the best course of action.